I linked my sugar cookie recipe above. It's so simple and no-fail, nearly anyone can be successful making these cookies. You'll want to make sure you have a great floured surface so your dough isn't moving around or sticking to your countertop when you need to transfer the cookie cut-outs to the baking pan.
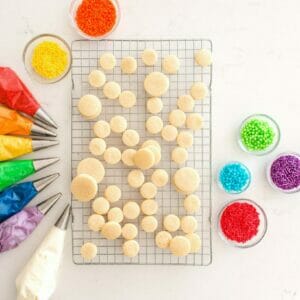
I used the smallest circle cutter for my cookies but you can make any shape or size you like. It would even be fun to make your kids favorite animal shapes!
Carefully transfer them to a baking sheet. I don't use parchment when I bake cookies, you can bake them directly on the cookie sheet. They bake up perfectly!
I normally bake 2.5-3" cookies for about 7-9 minutes. For these little tiny circles I baked them for 5. If it's your first time baking, keep an eye on the first batch to see how your oven bakes. You'll be looking for a nice puffy cookie with slightly browned edges.
As your cookies bake and cool, you can make the icing! You can use my recipe HERE or save some time and use Wilton's decorator icing and color it in rainbow colors.
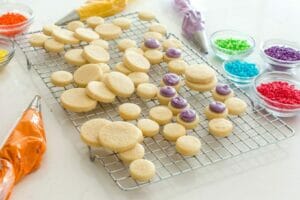
Fit disposable decorating bags with round decorating tips and fill with colorful icing. I went ahead and made all of the colors of the rainbow but you could just make a few of your favorite colors! This project is definitely a "make it your own" kind of creation.
To pipe icing onto the cookies, you'll want to hold the bag vertical and using a consistent pressure, begin piping icing onto the cookie in a clockwise motion.
Let cookies crust a bit on a drying rack or tray. They take 6-8 hours to fully crust over for easy packaging or stacking later. If you want them to be sprinkled, you'll want to sprinkle them while the icing is still soft. The easiest way to sprinkle cookies is to dump sprinkles into a small bowl and dip the cookies into it!
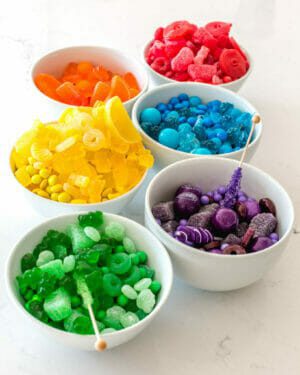
While you wait, separate candies into different bowls. Kids are very helpful with this portion!
I used Skittles, M&M's, Runts, LifeSavers, Sour Patch Kids, Gumballs, Sixlets, Rock Candy, Gummy Bears and more. JOANN has a good selection of candies near their cash wraps.
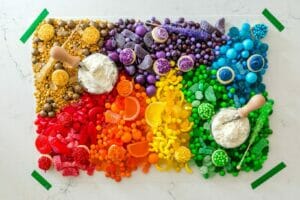
Here comes the fun part. Cut a piece of parchment paper (or you can use a board or tray) and tape it onto your counter or table where the treats will be displayed. Place small bowls of icing and melted candy melts sporadically around the board.
Using the separated candies, begin building your board! Start with the red candies and grow from there, making each section of the rainbow around your board.
When the candies are placed, add cookies! I filled in my board with completed cookies and naked cookies, making it an interactive dessert board for guests or kids to spread their own icing or candy melts and then attach their favorite candies to the cookies. It is a big, sugary, colorful dream board!