How to Make a Shag Cake
This post was sponsored by JOANN. All opinions are my own.
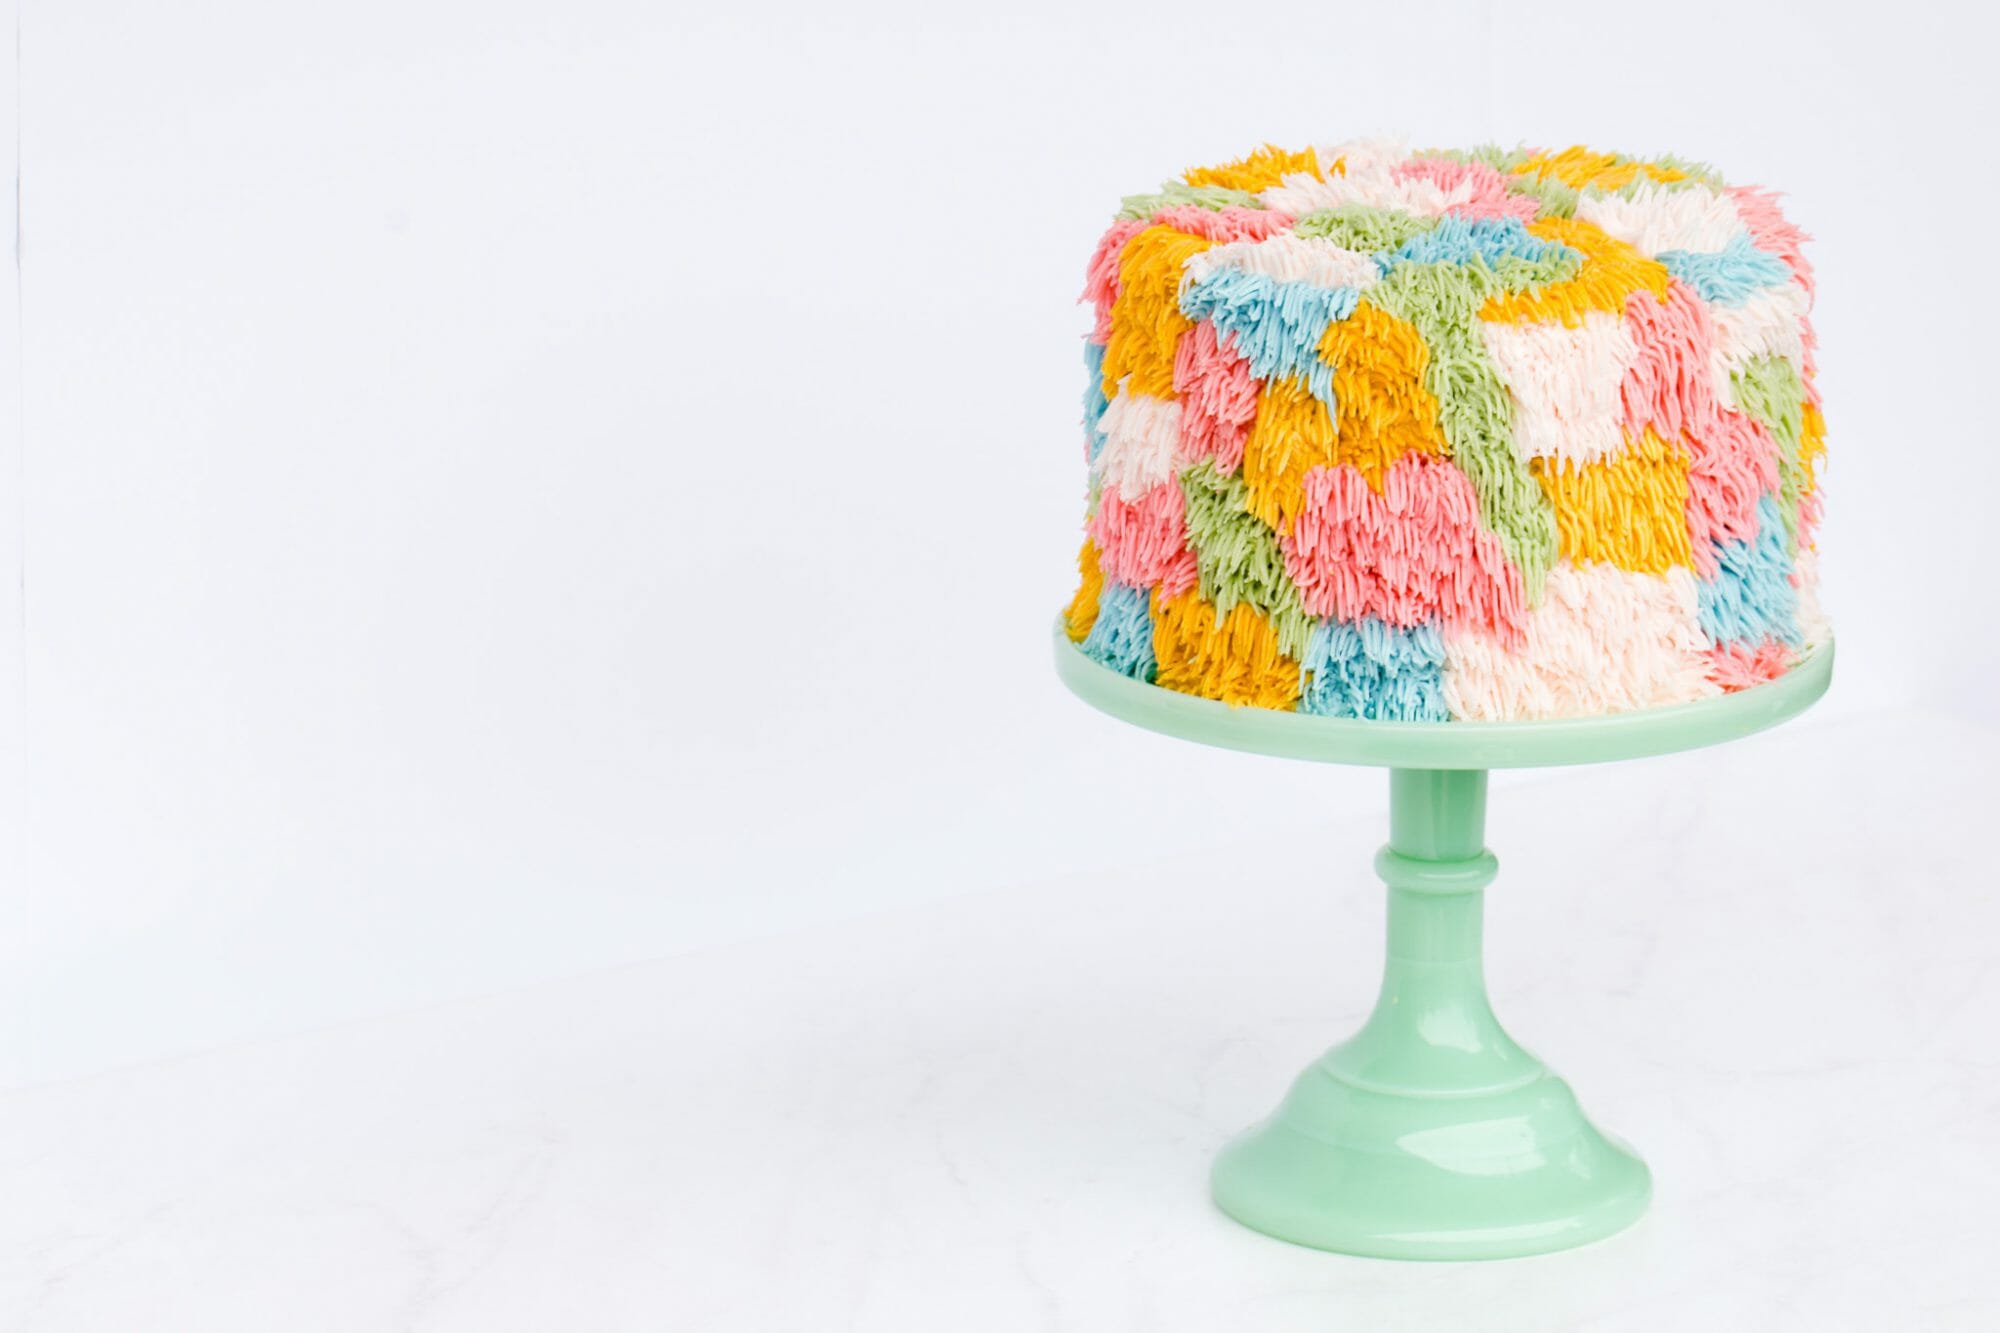
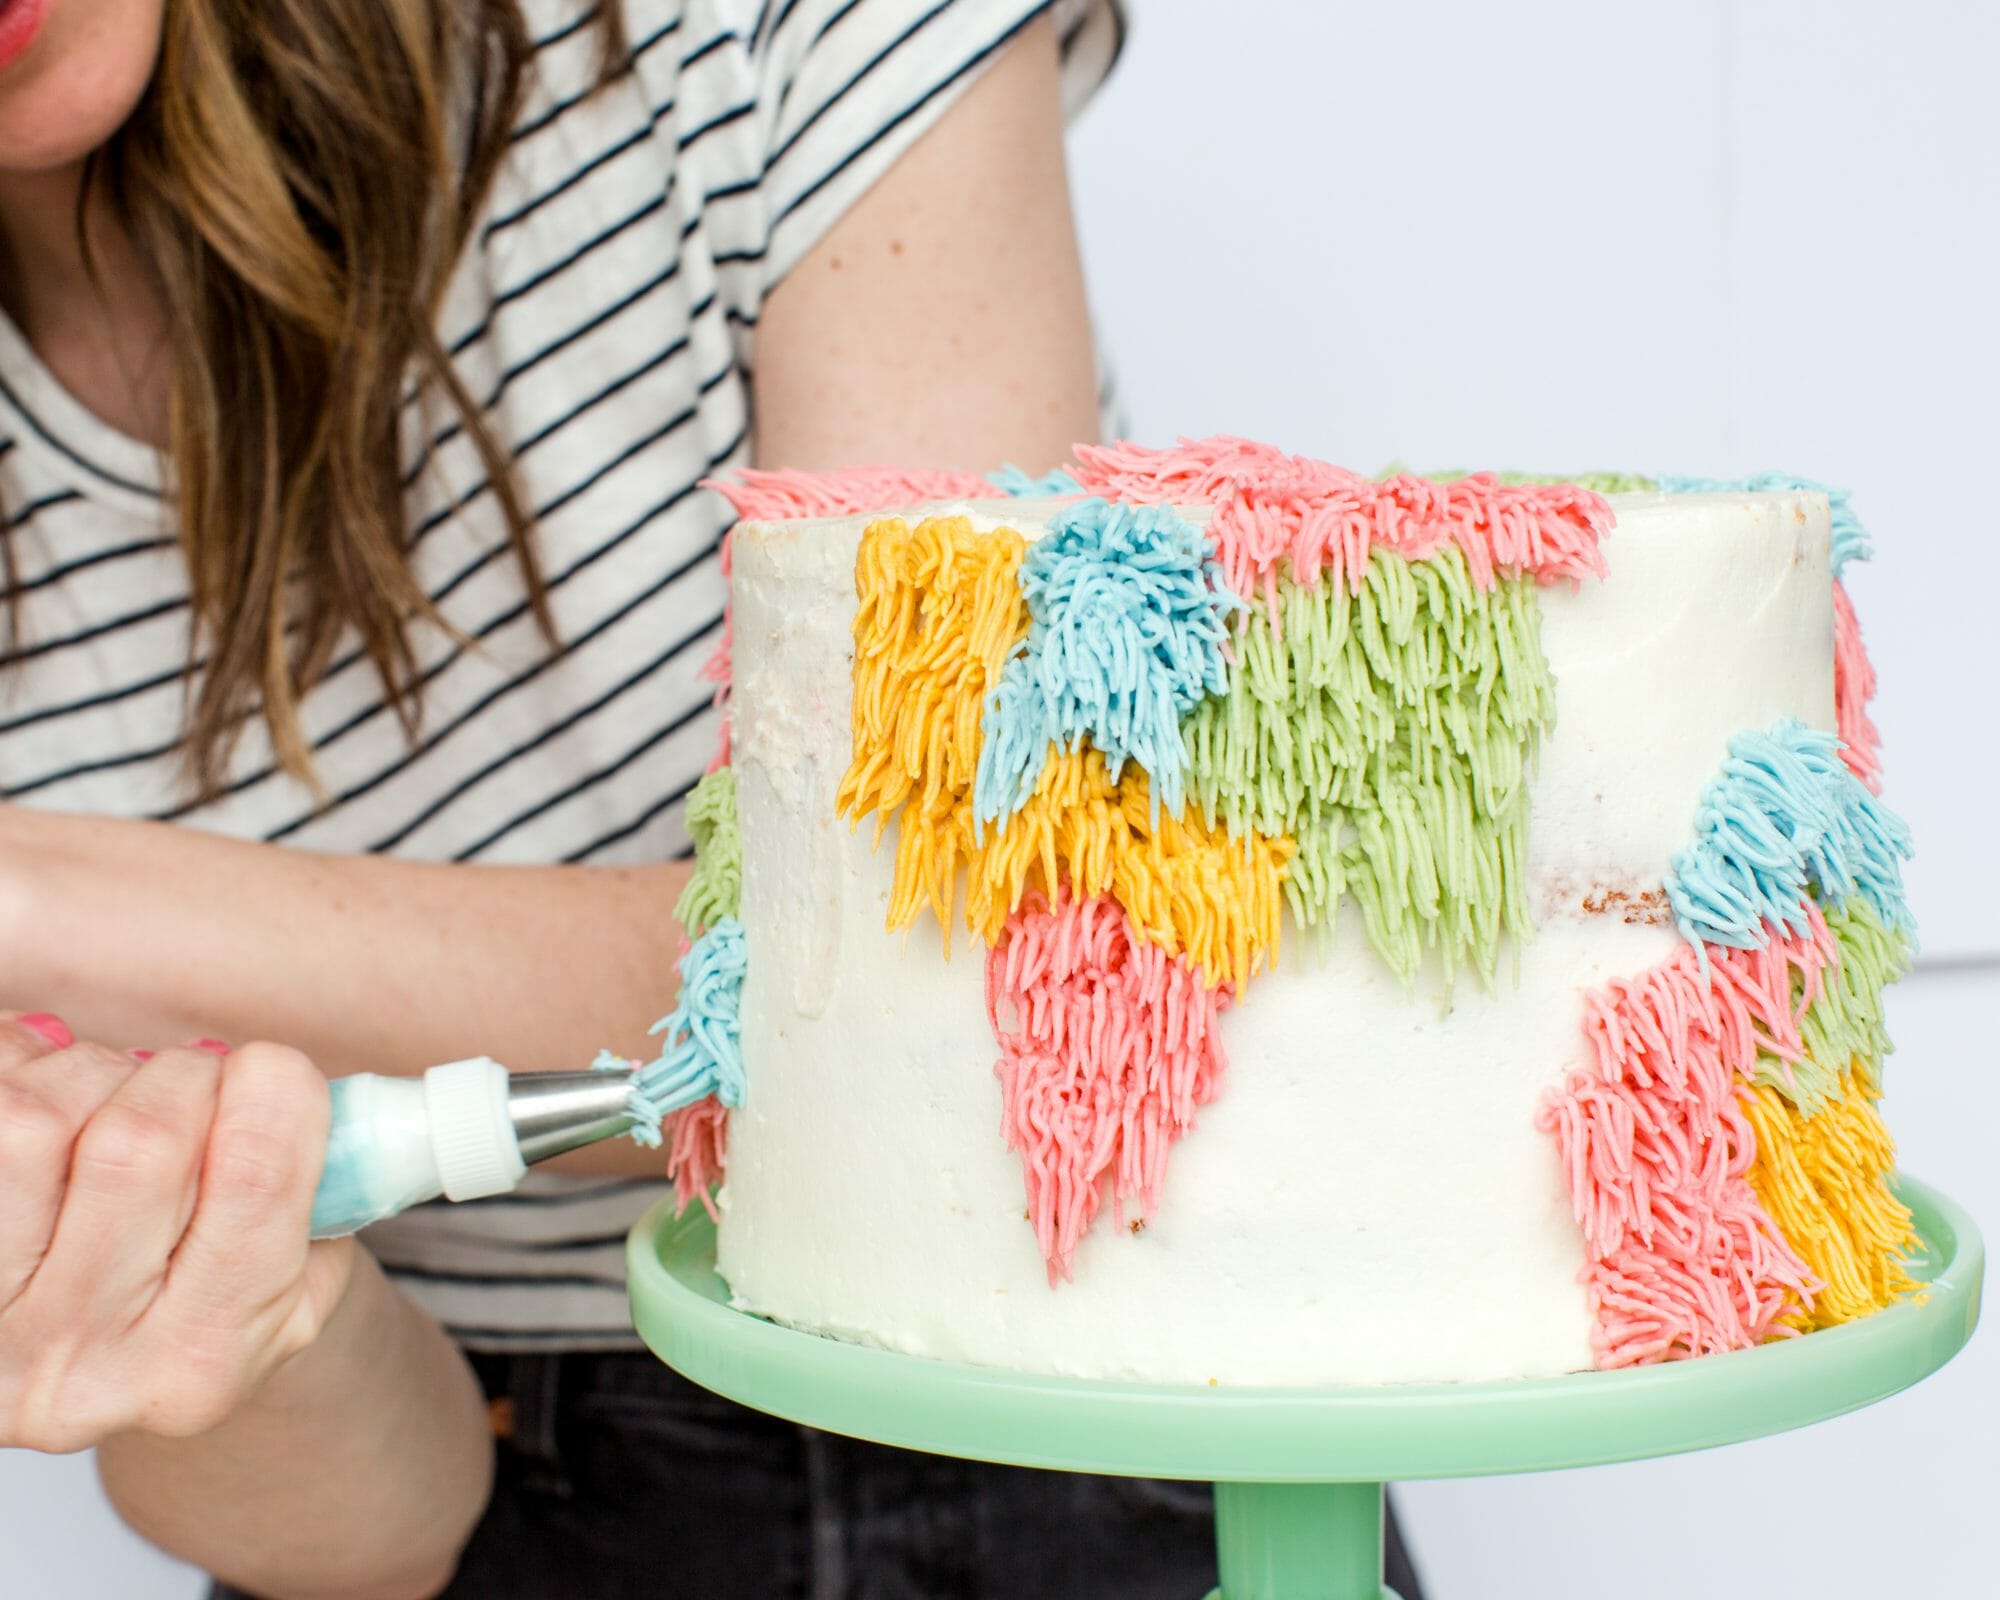
I’m obsessed with this new cake decorating technique created with a Wilton grass tip: A Shag Cake! It’s super simple to create and can be replicated in your favorite colors to match any party or celebration.
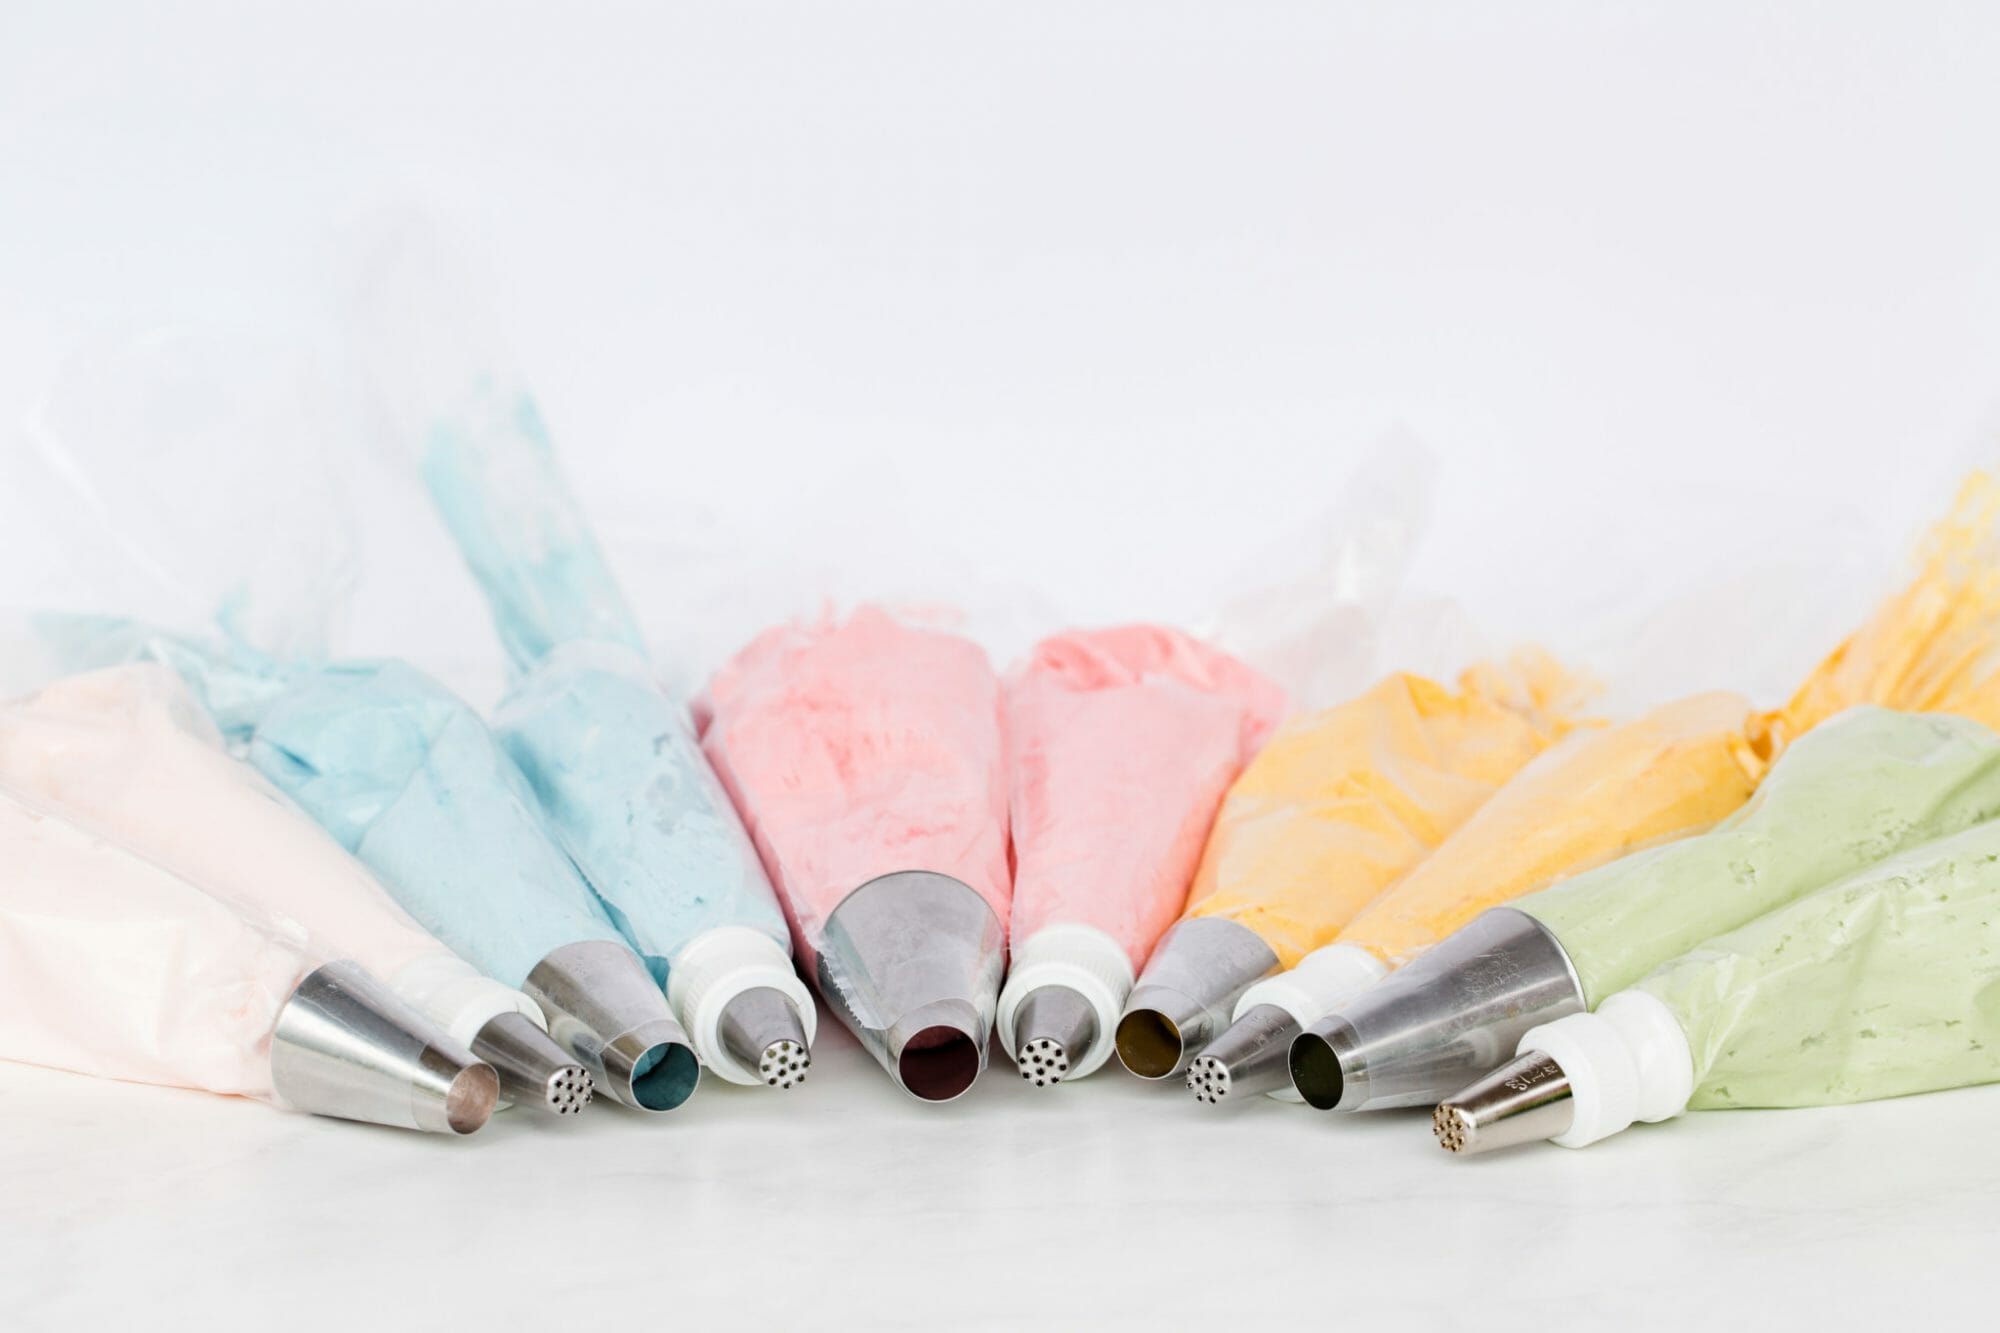
I chose a funky palette of mustard yellow, avocado green, a few shades of pink with a pop of blue. To recreate the cake, you’ll need a few things from JOANN:
Cake, baked and cooled
Wilton Decorator icing or your favorite recipe
(4-5) Wilton grass tips
(4-5) Wilton round cupcake tips
Disposable decorating bags
Angled spatula
Cake Icer Tip
Cake circles
Wilton Color Right System
Bench Scraper
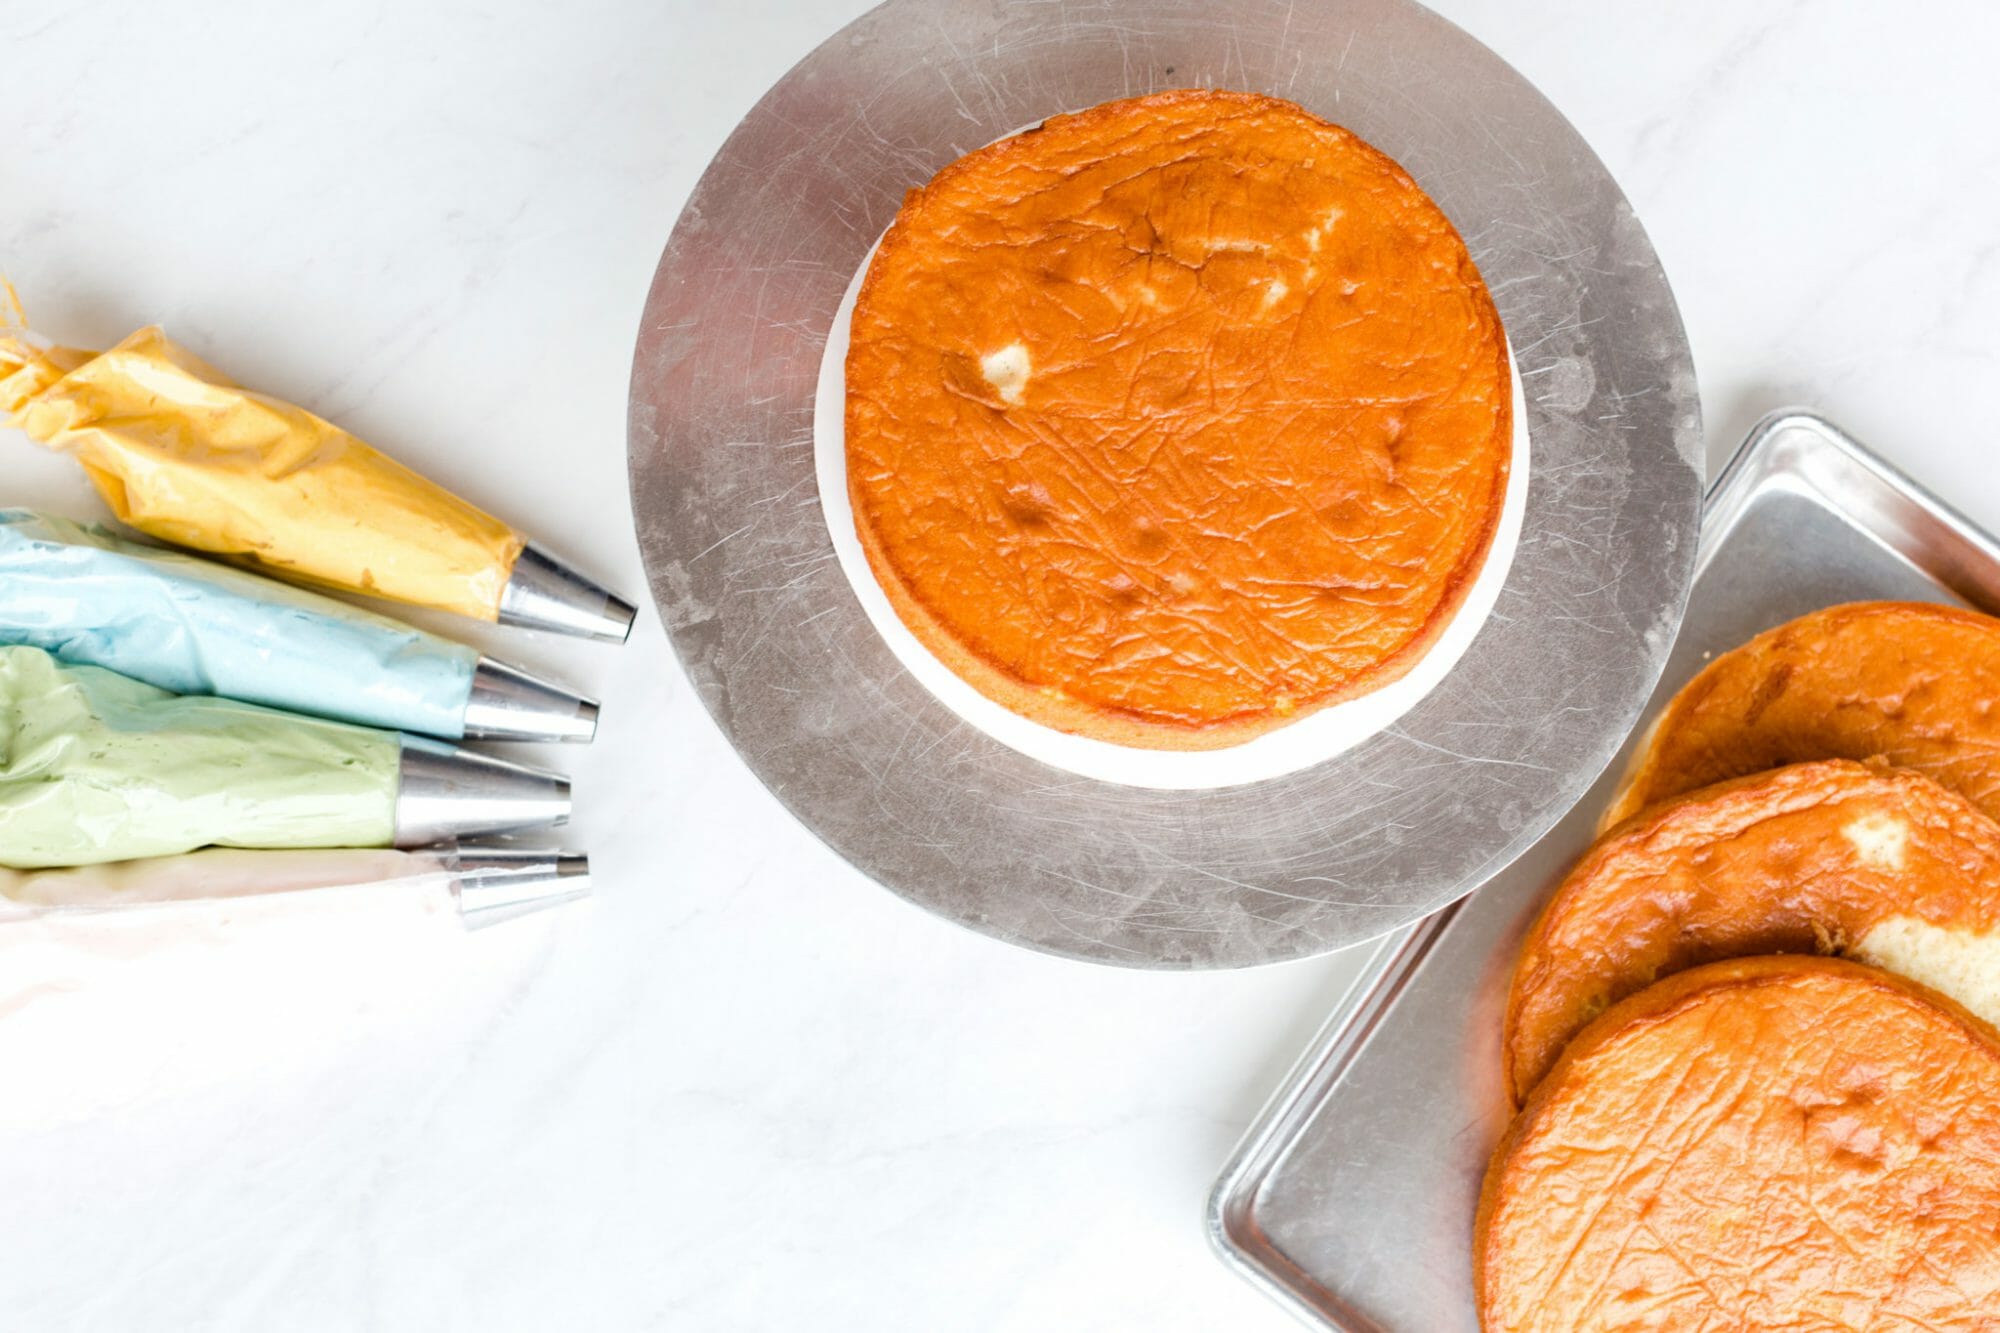
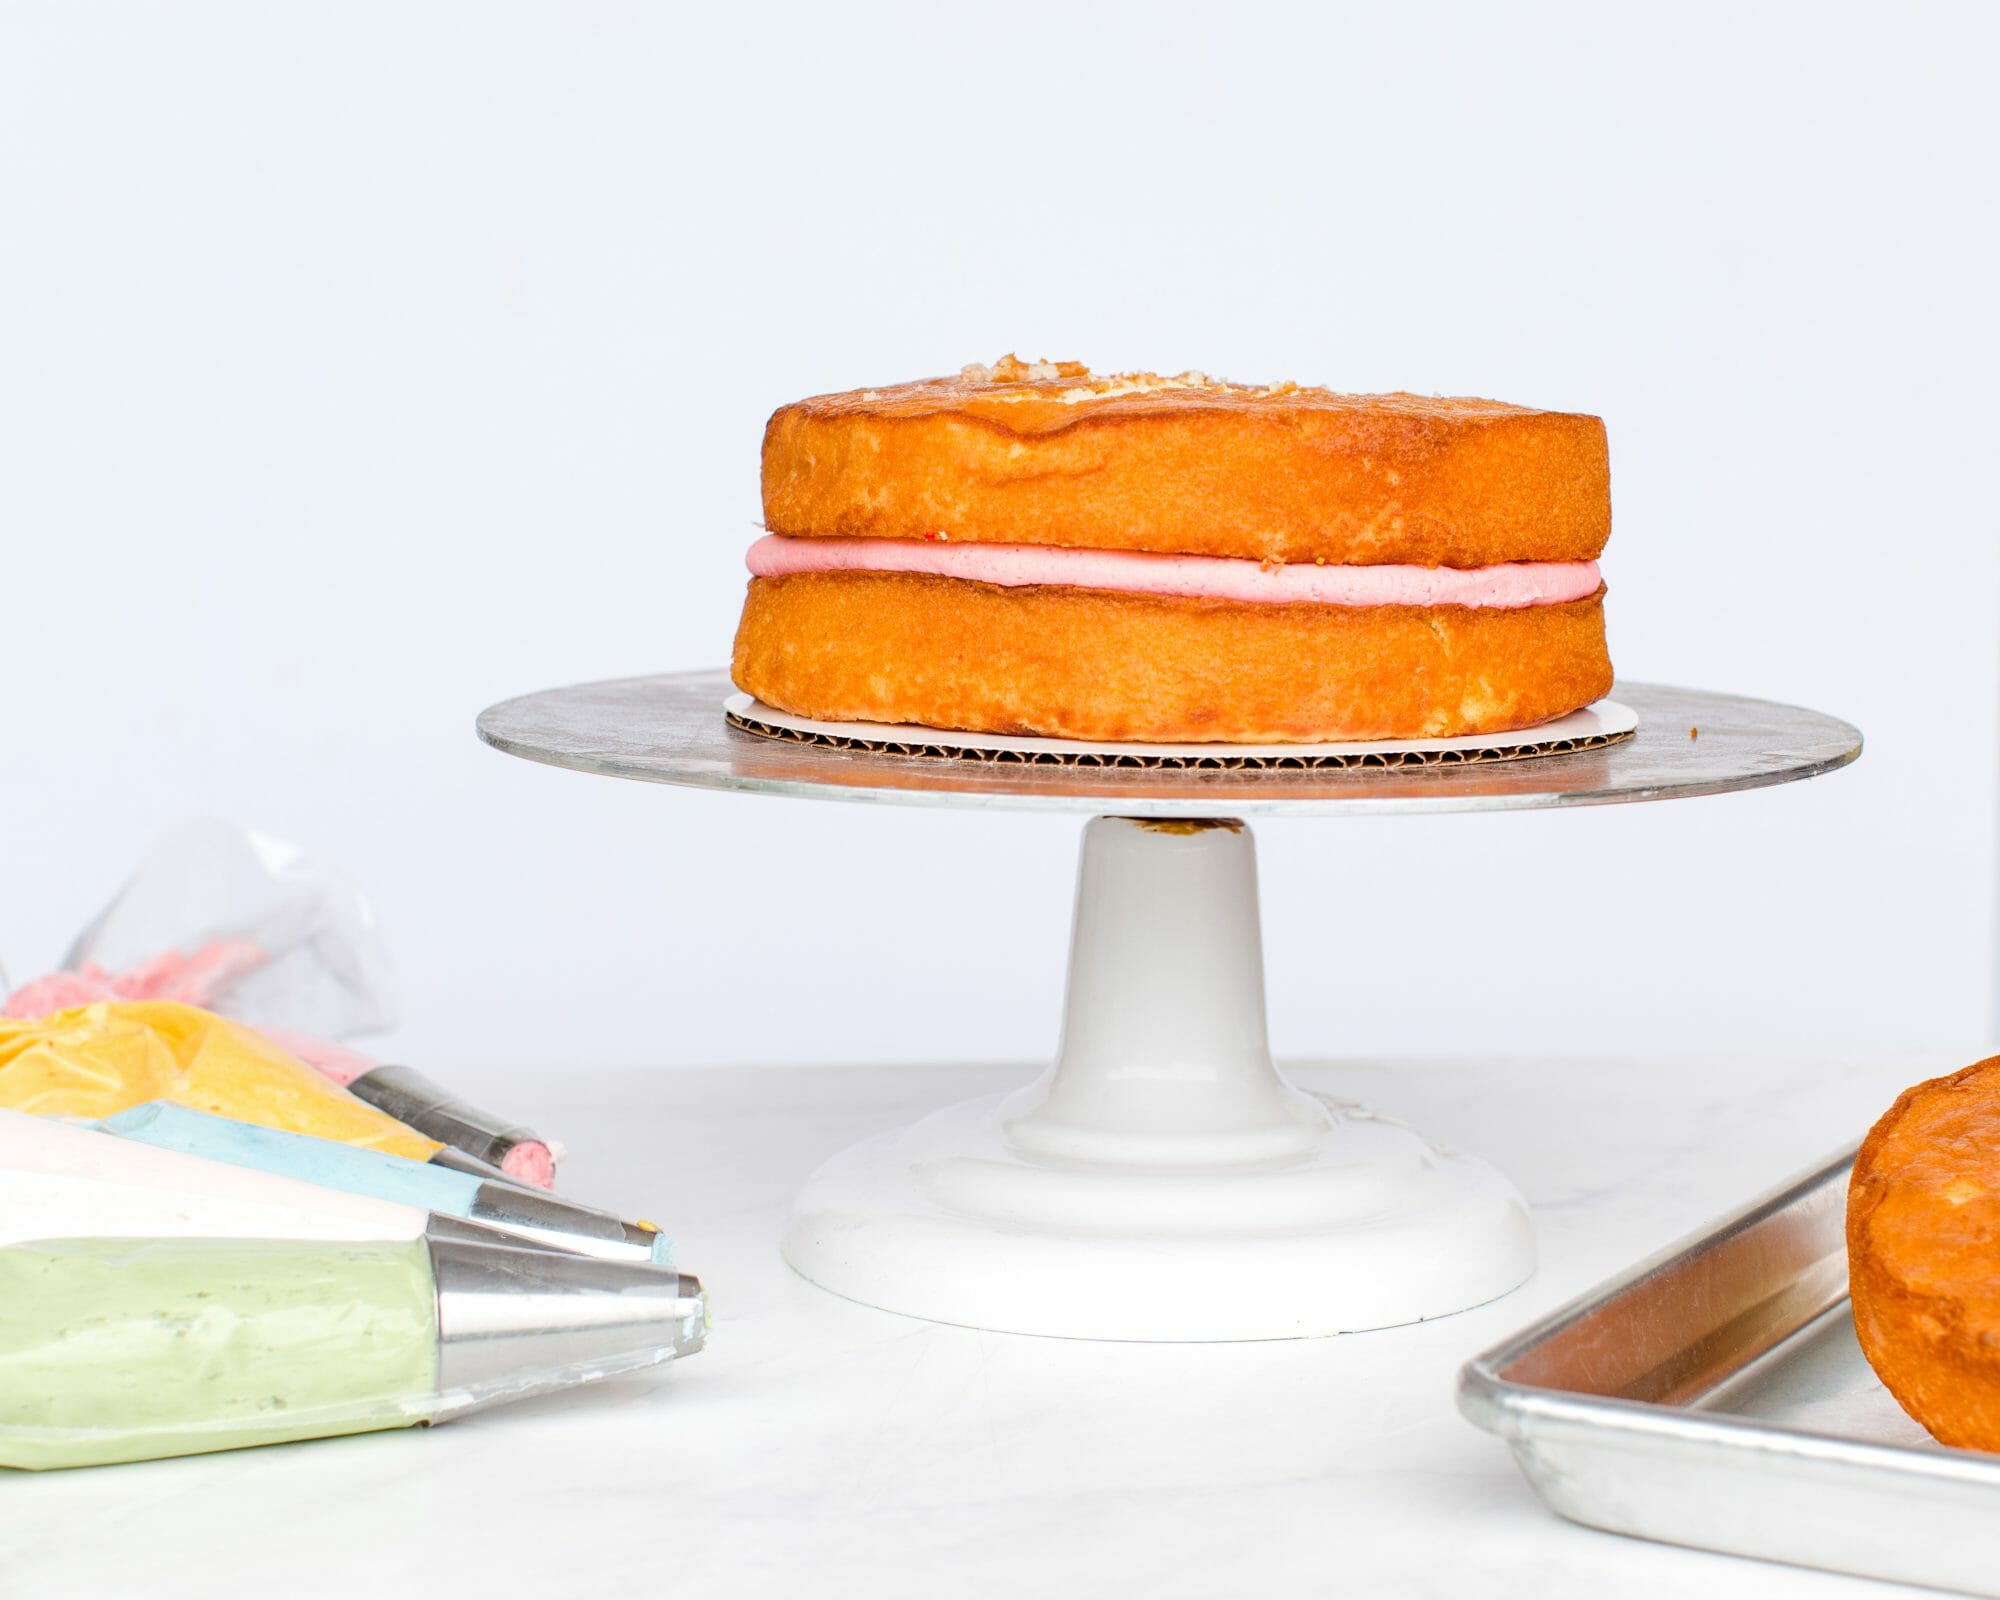
You’ll want to start with your favorite cake recipe, baked and full cooled. If necessary, trim the crowns of your cake before beginning. On a cake circle the same size as your cake, dot a small amount of icing onto the board to act as a glue to adhere your cake to the cake circle.
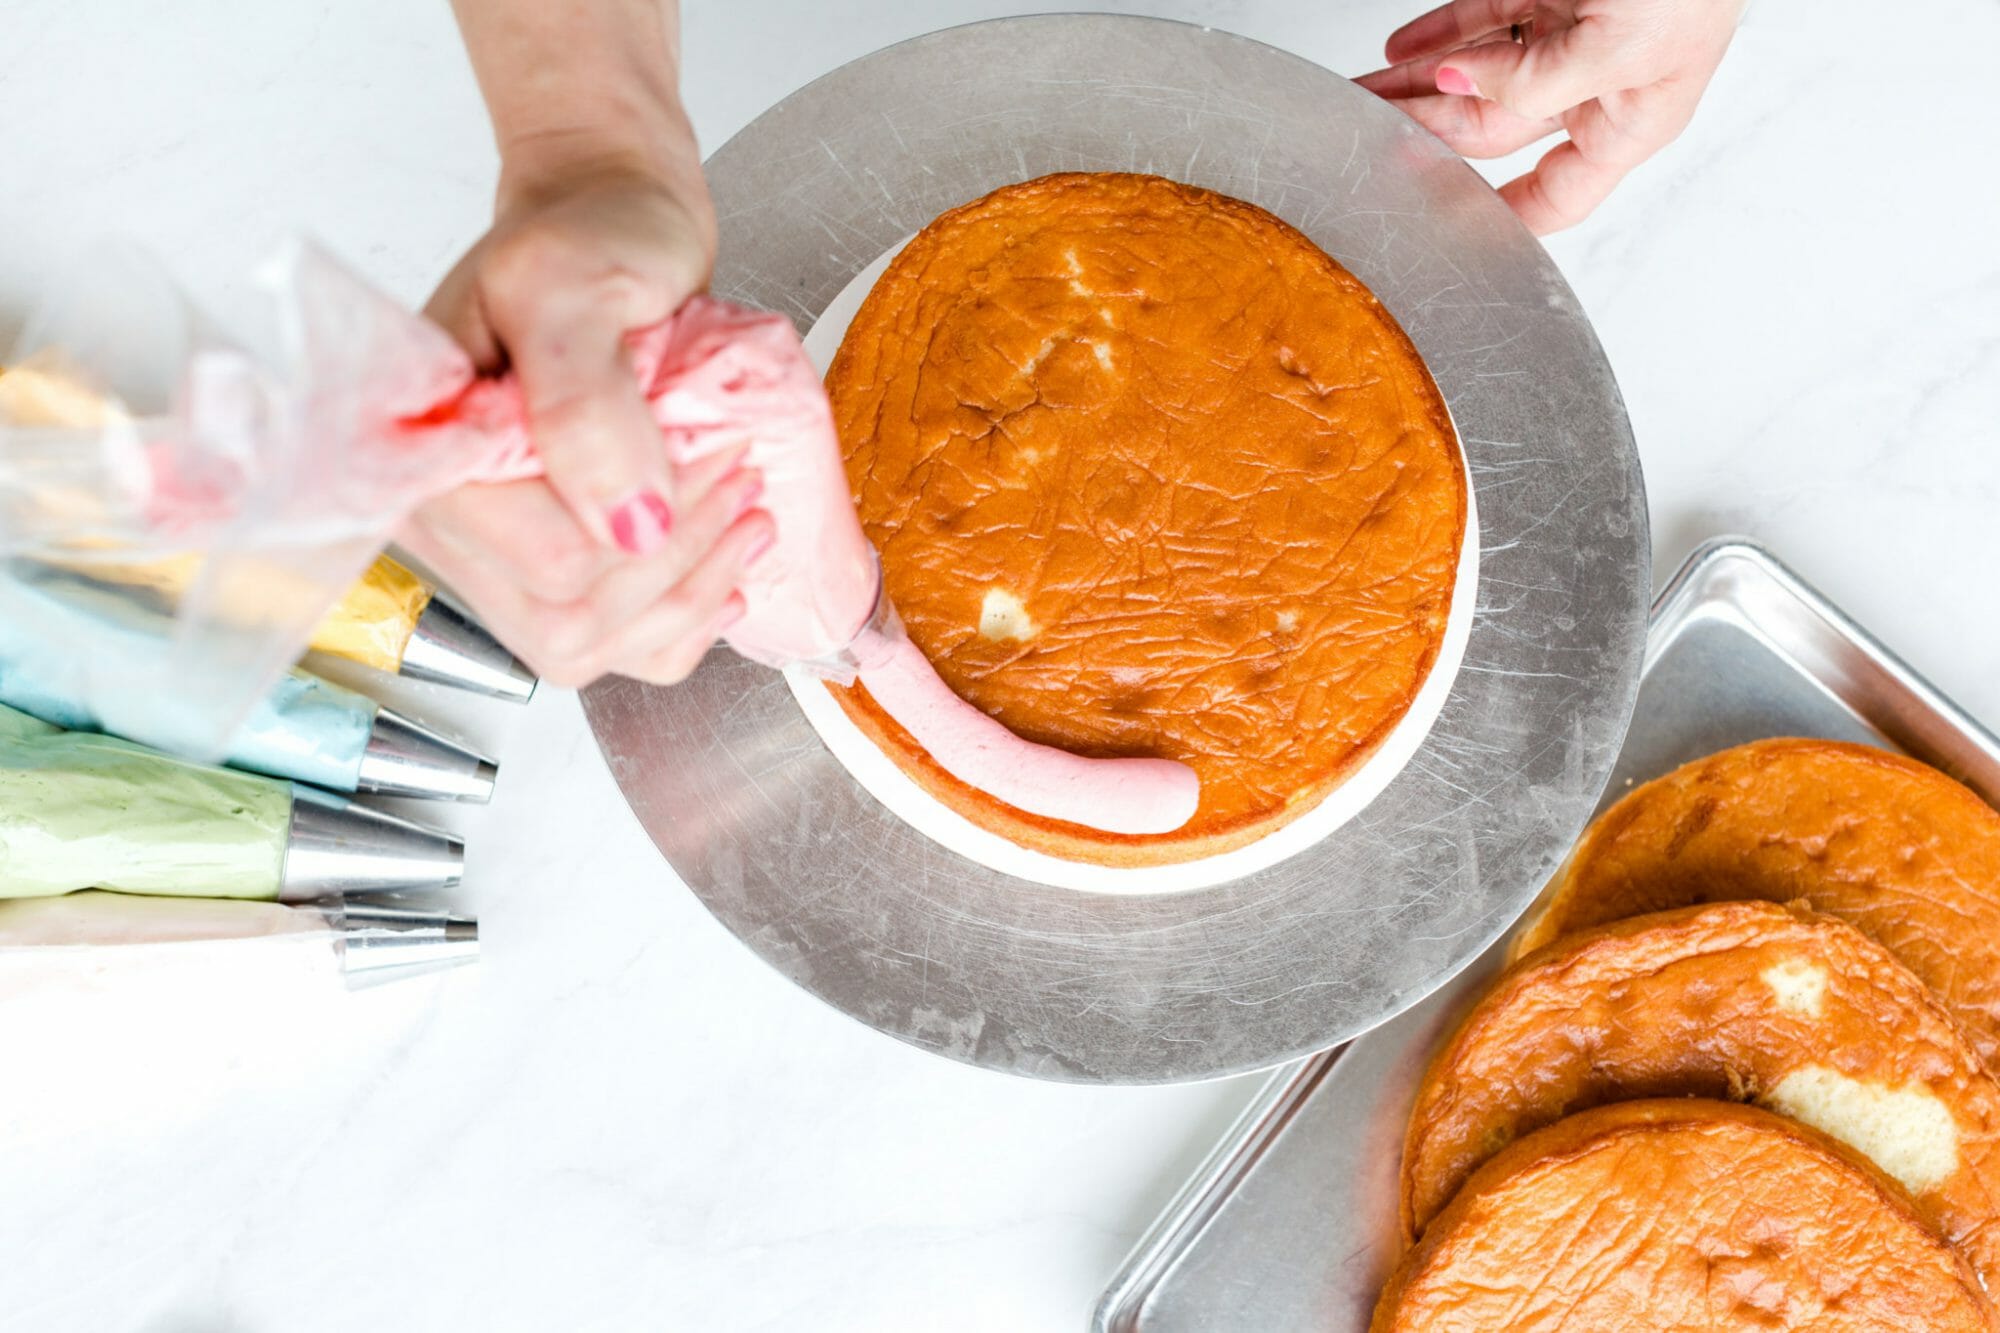
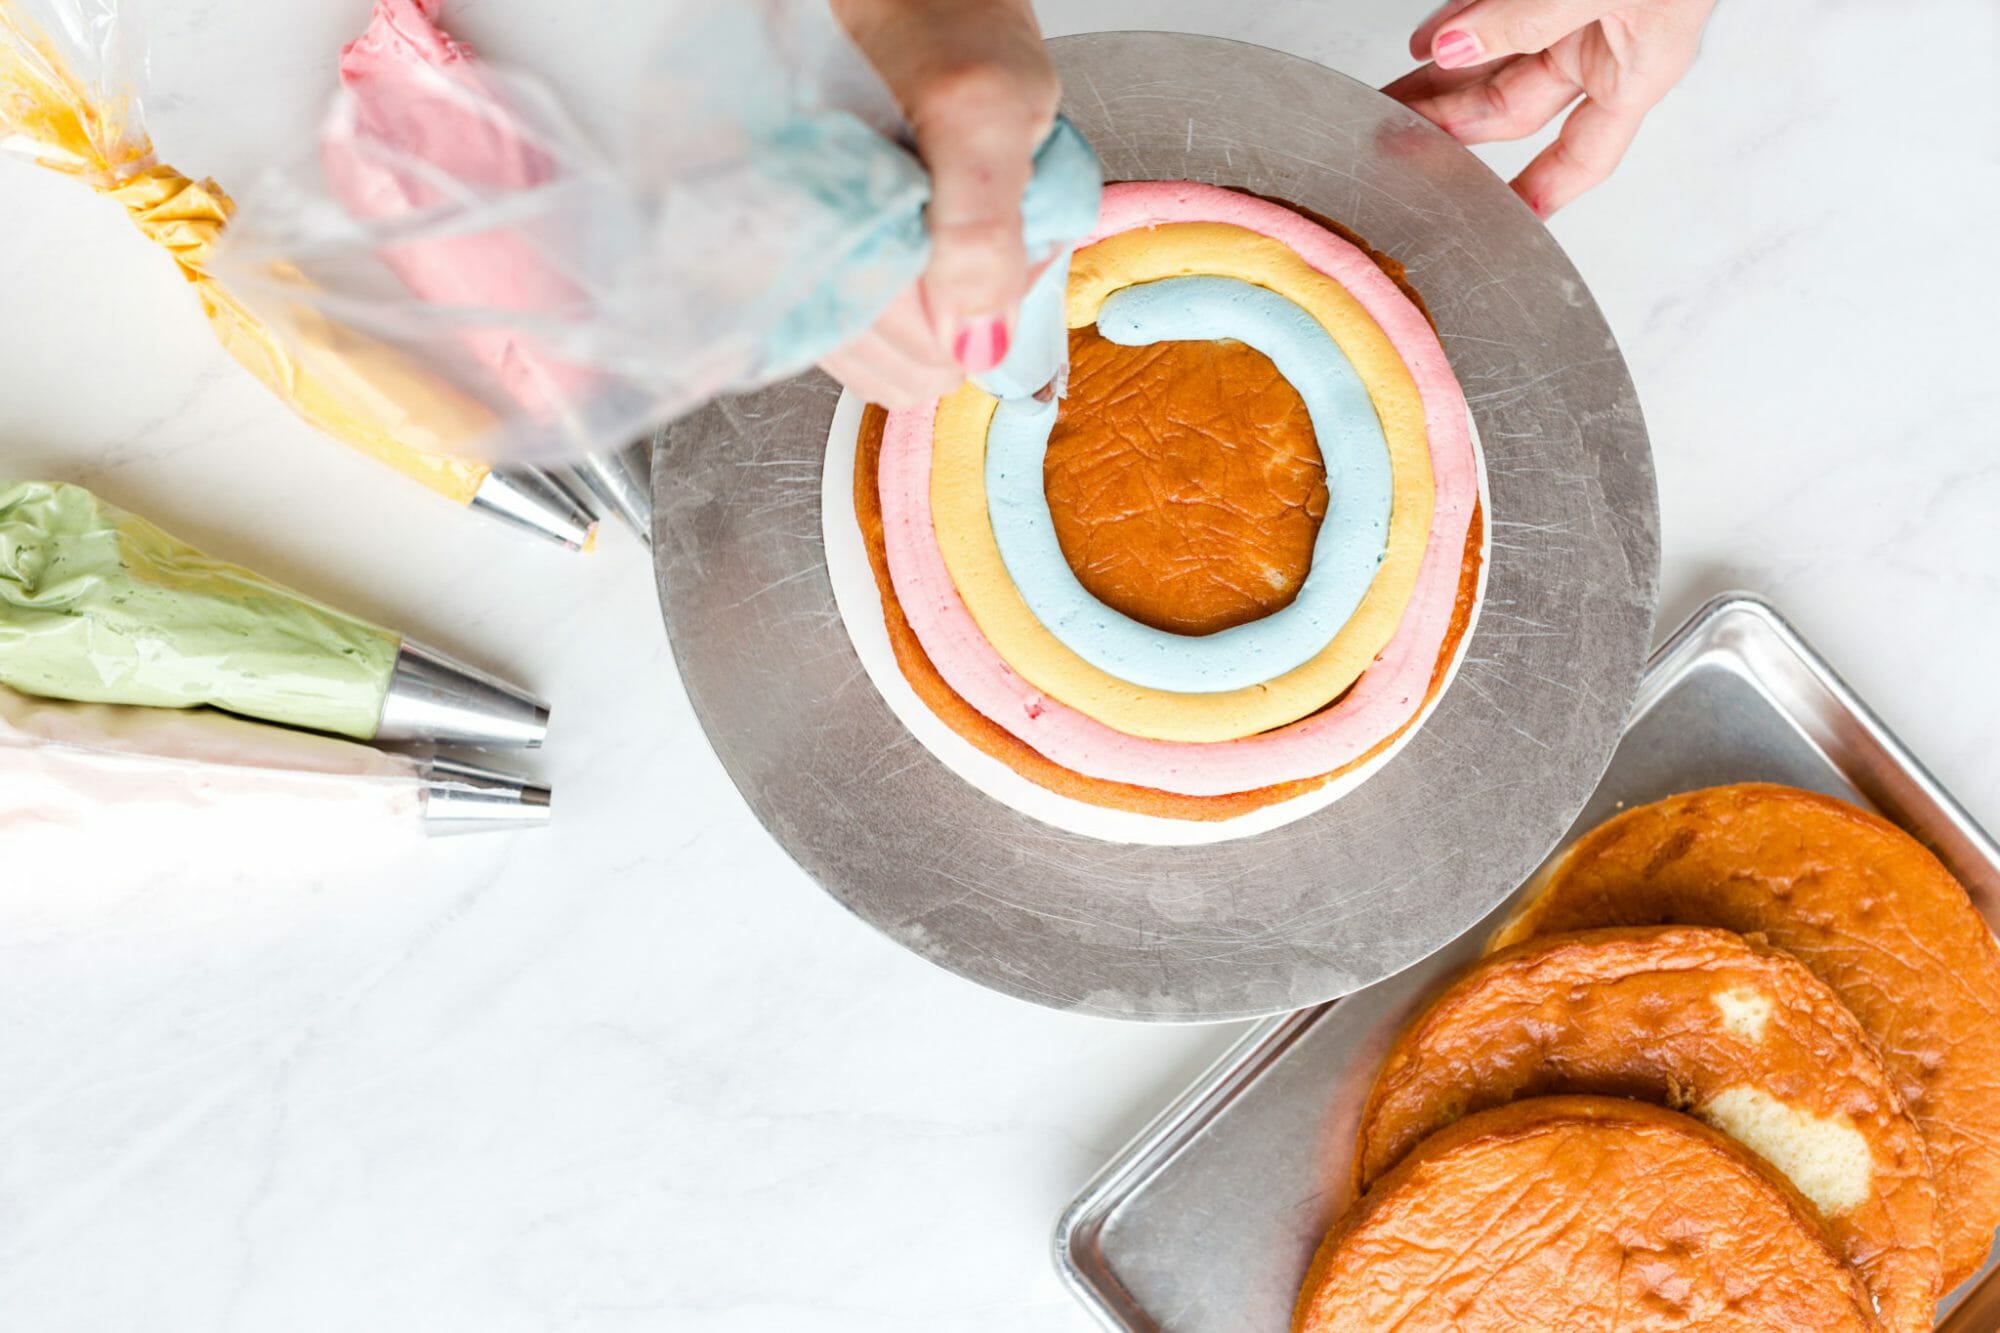
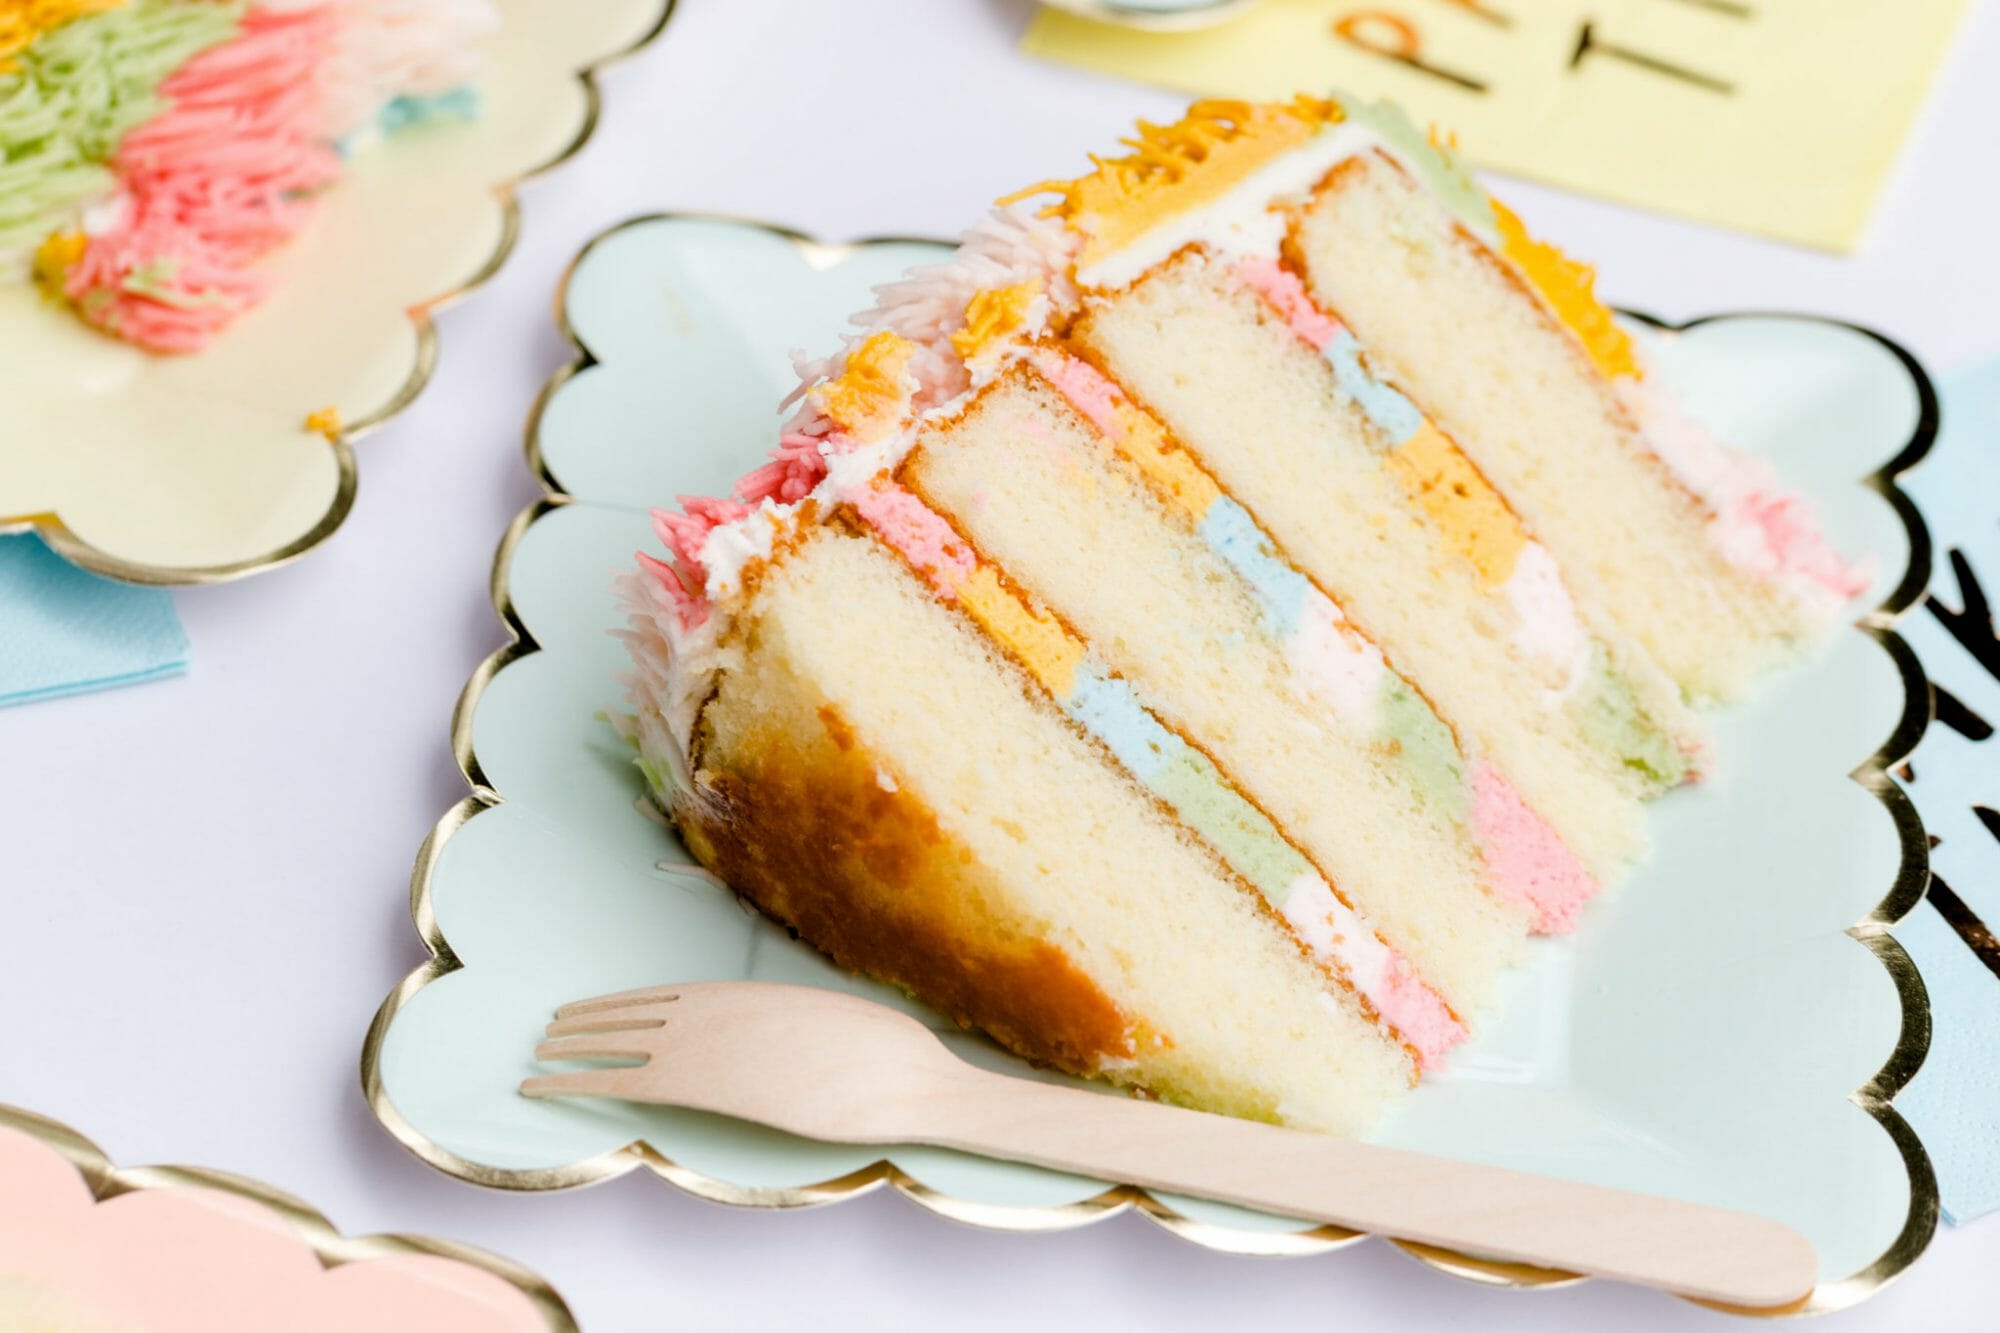
With the first layer in place, draw a circle along the outer edge of the cake with a piping bag filled with colorful icing fitted with a large round decorating tip.
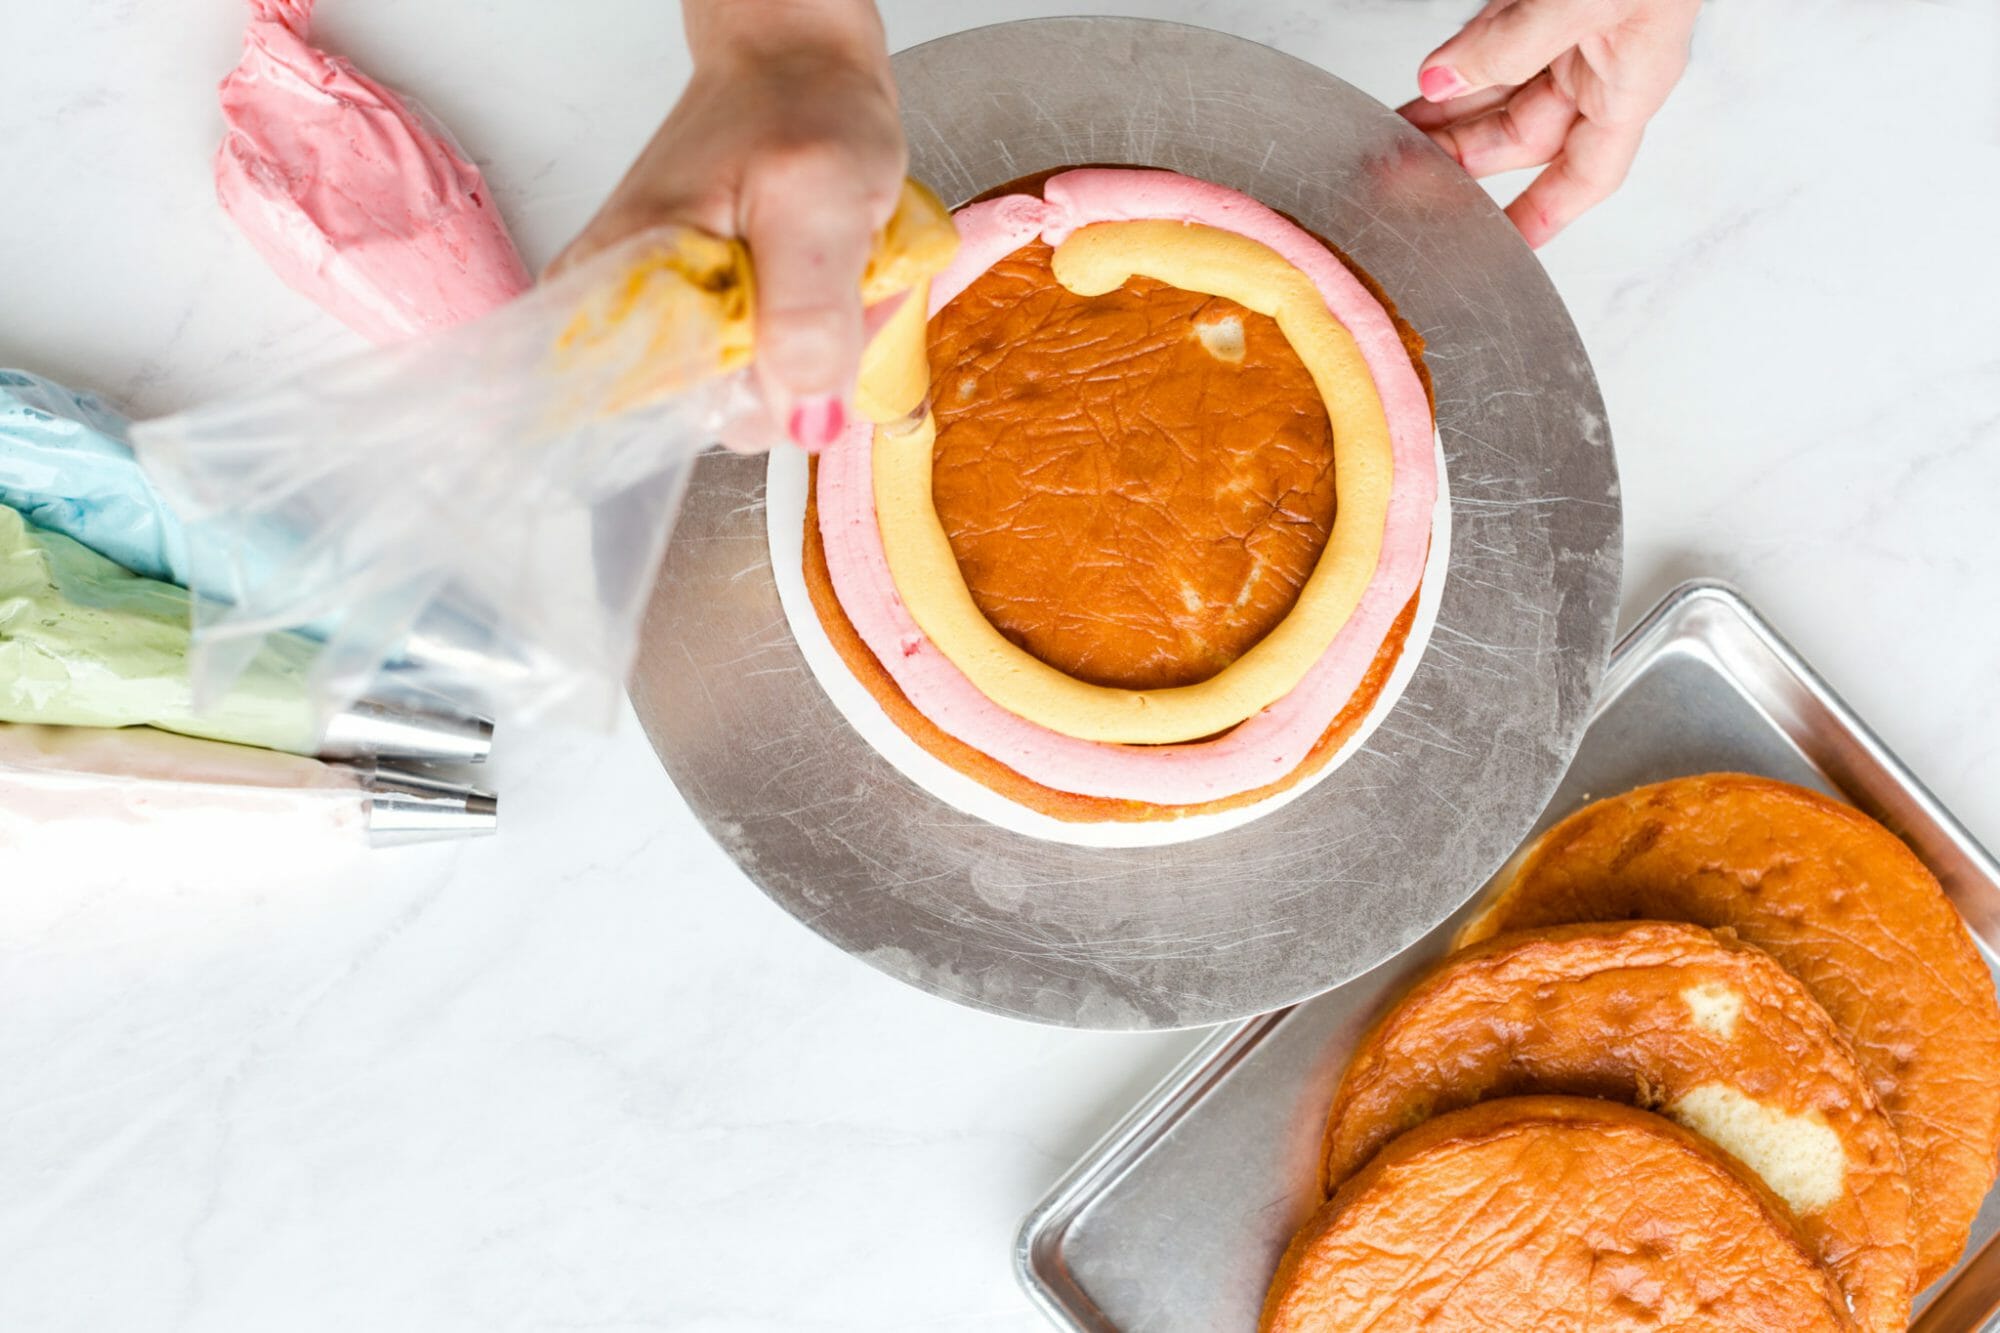
Repeat circles with various colored icings until you reach the center of the cake.
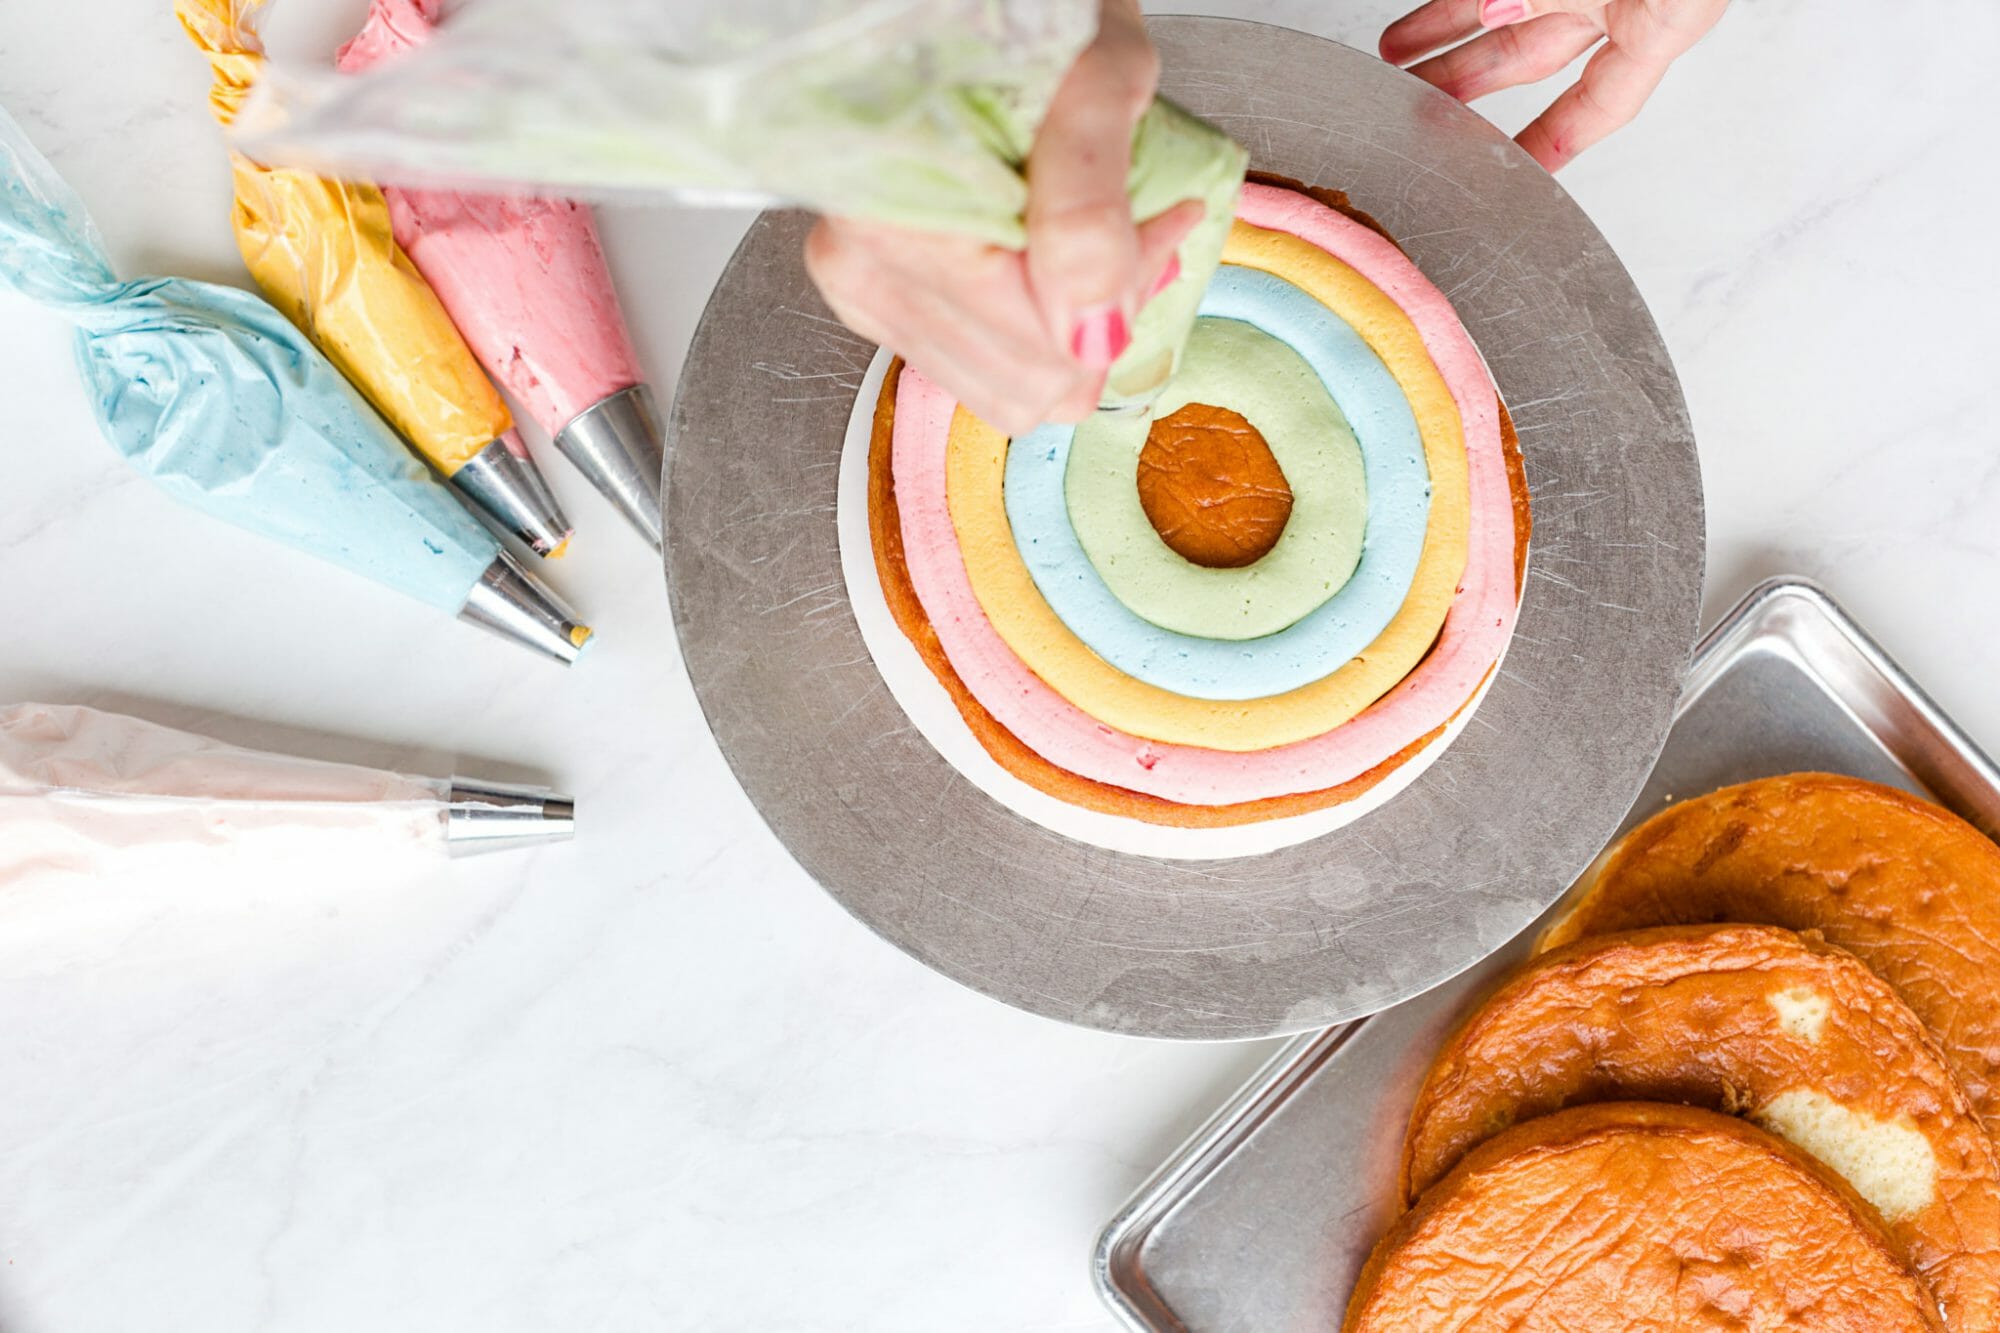
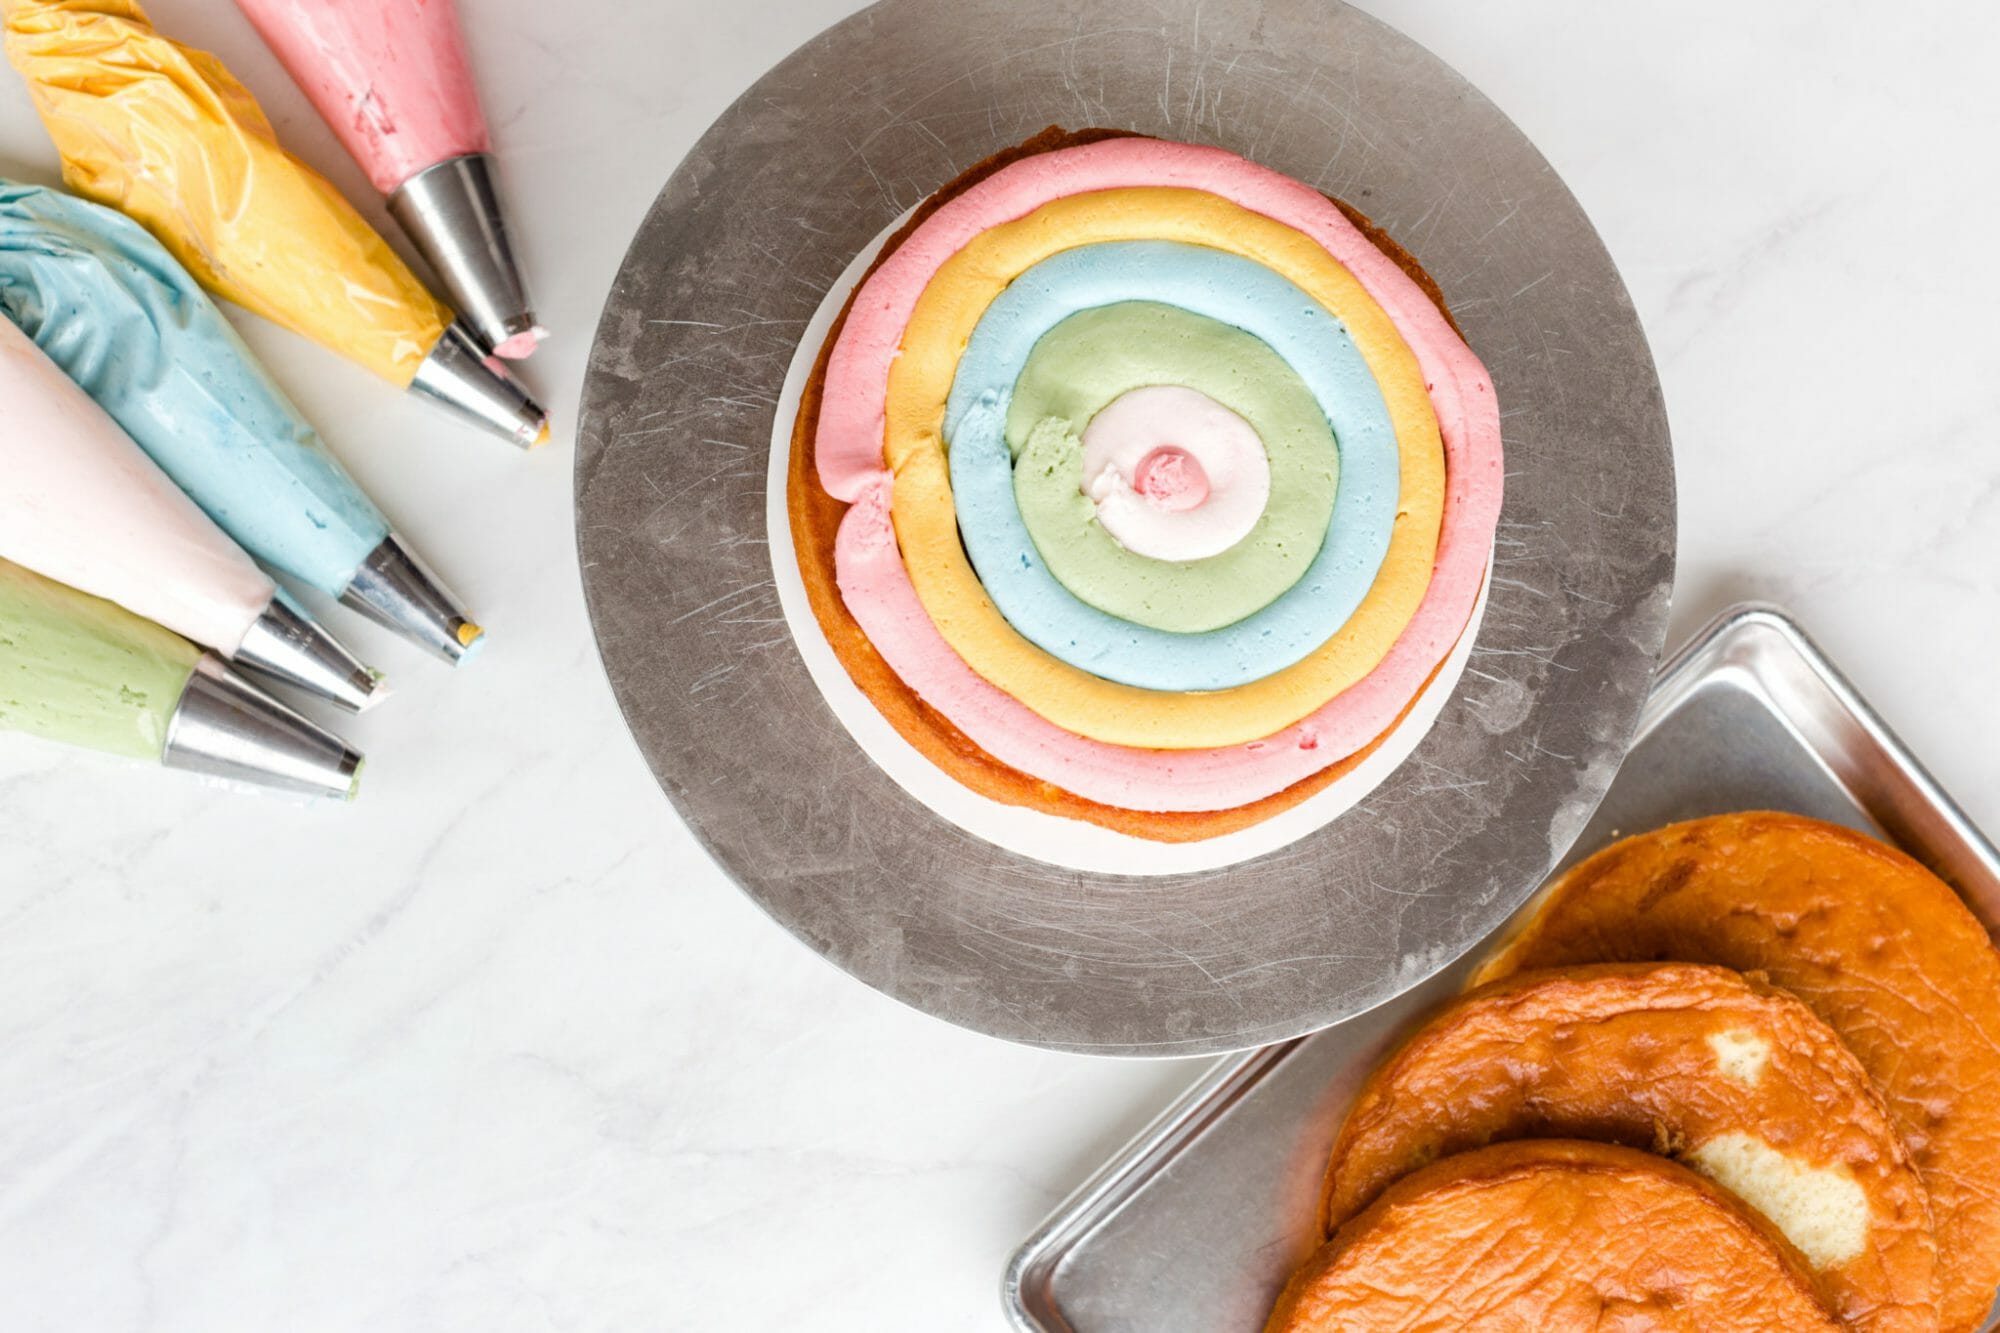
Gently place second cake layer on the top of the first layer.
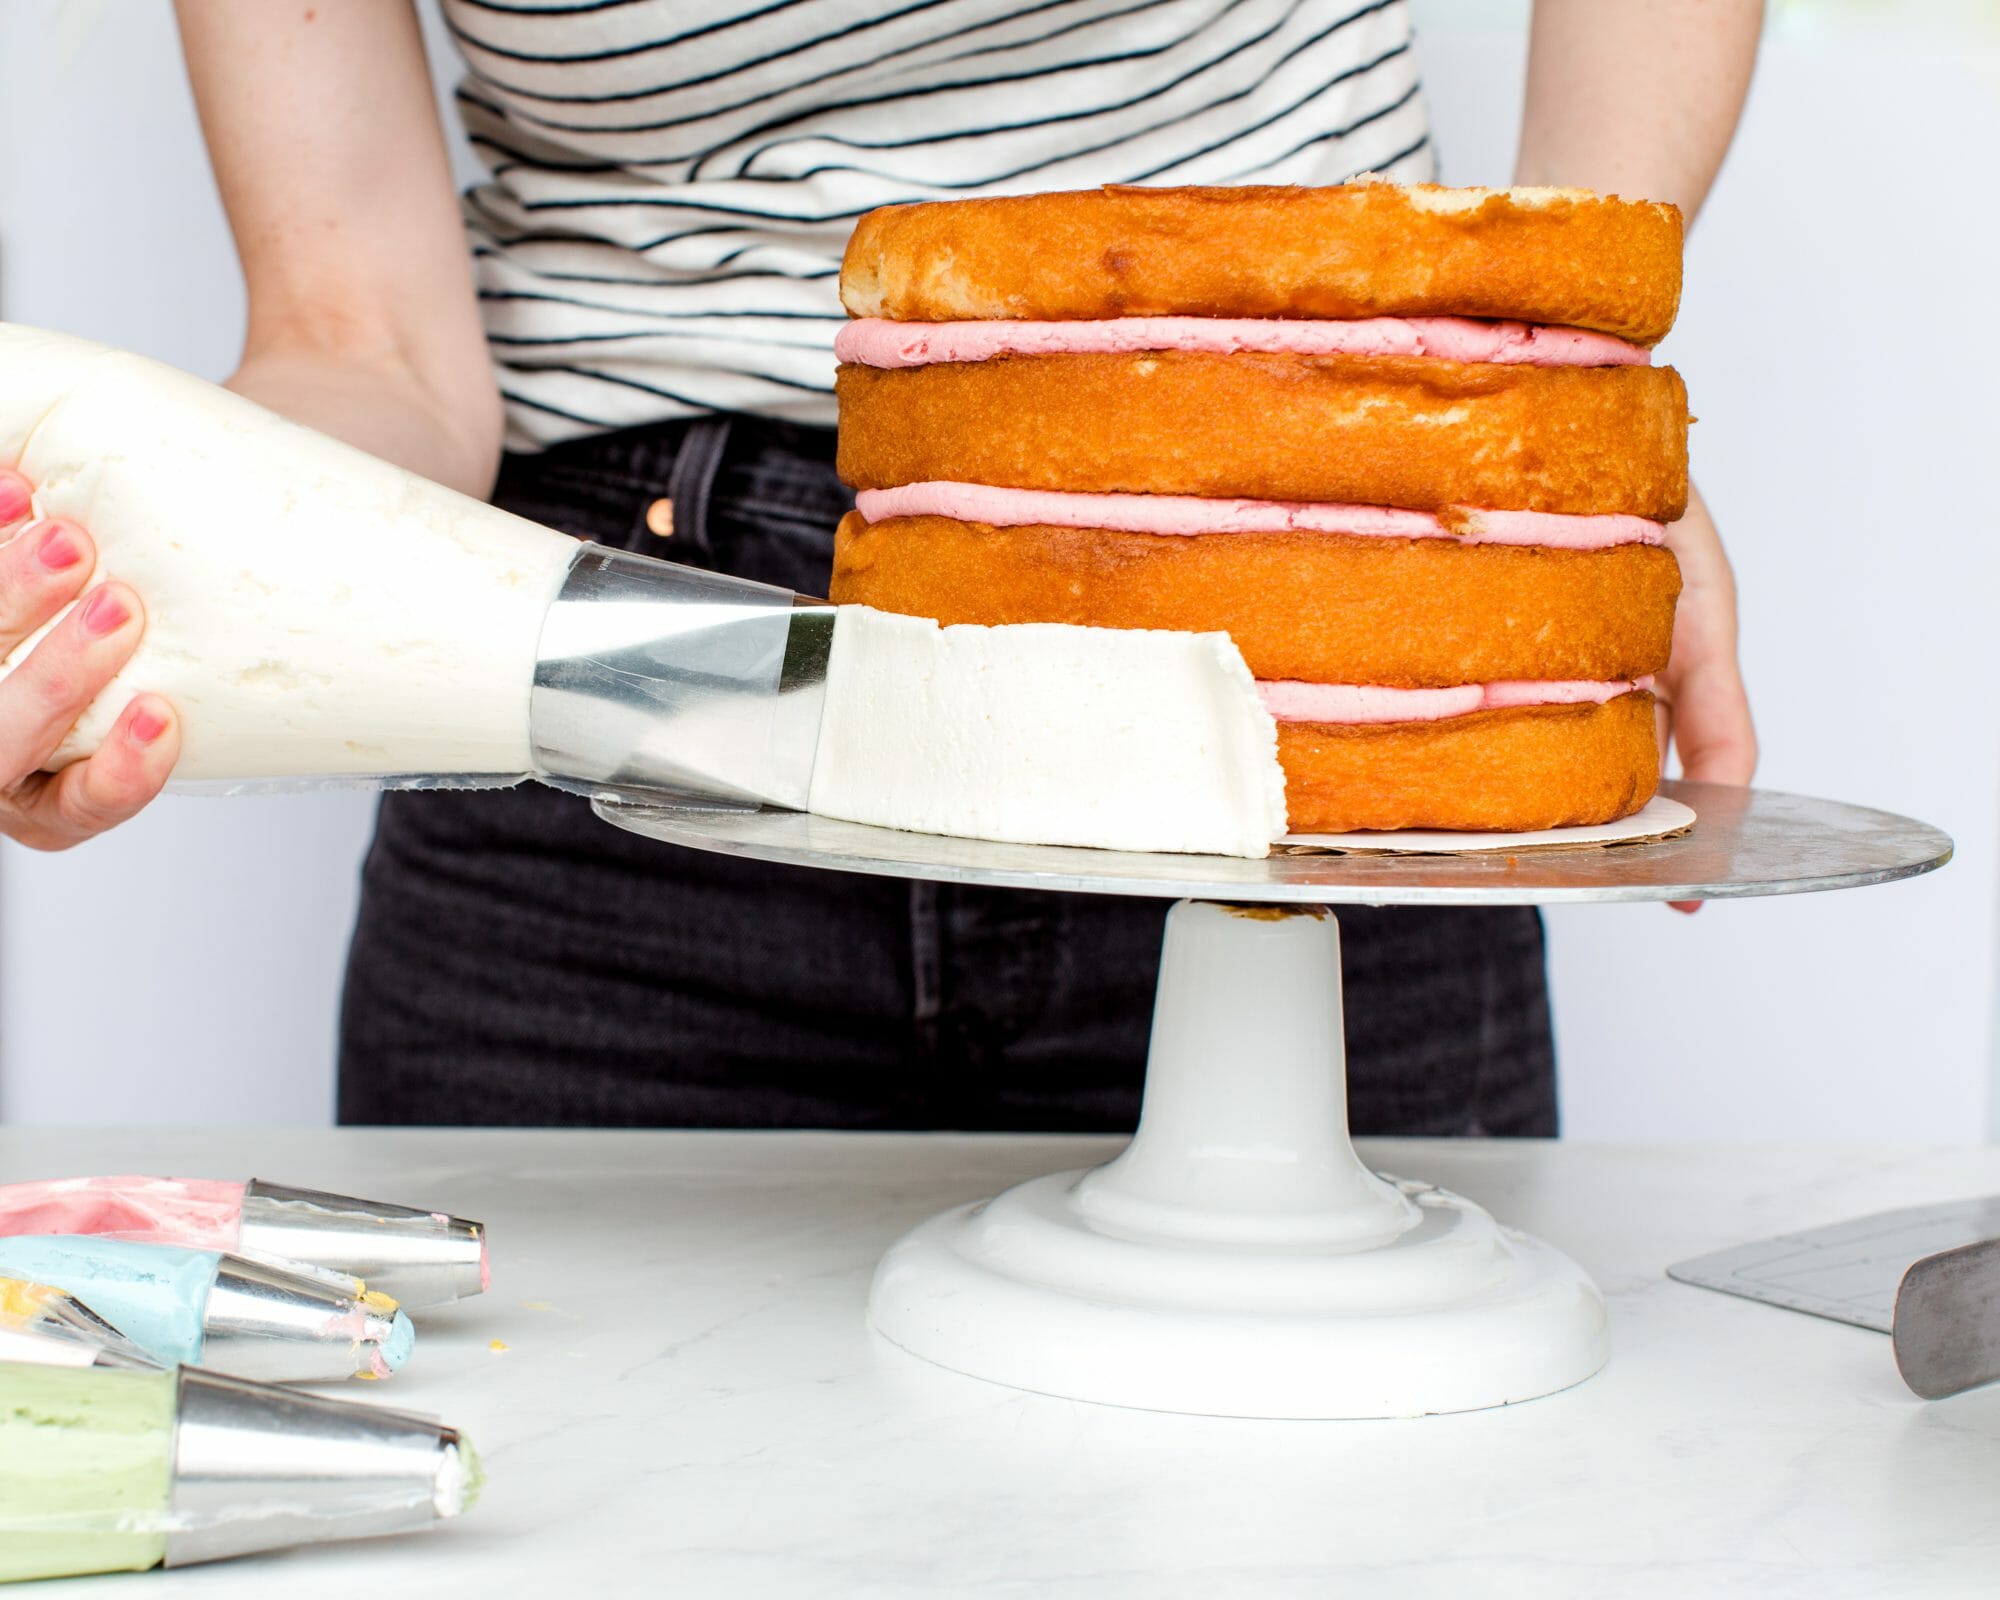
Repeat steps until all cake layers have been topped with colorful buttercream rings and topped with remaining cake layers leaving the last layer naked.

Give the top cake layer a good push down to level the cake and press out any air. Using a disposable decorating bag filled with buttercream icing fitted with a cake icer tip, begin piping a layer around the entire cake. When the sides of the cake are covered, pipe buttercream around the top of the cake.
Using a bench scraper, gently scrape sides of the cake to smooth the icing giving each the cake a nice crumb coat.
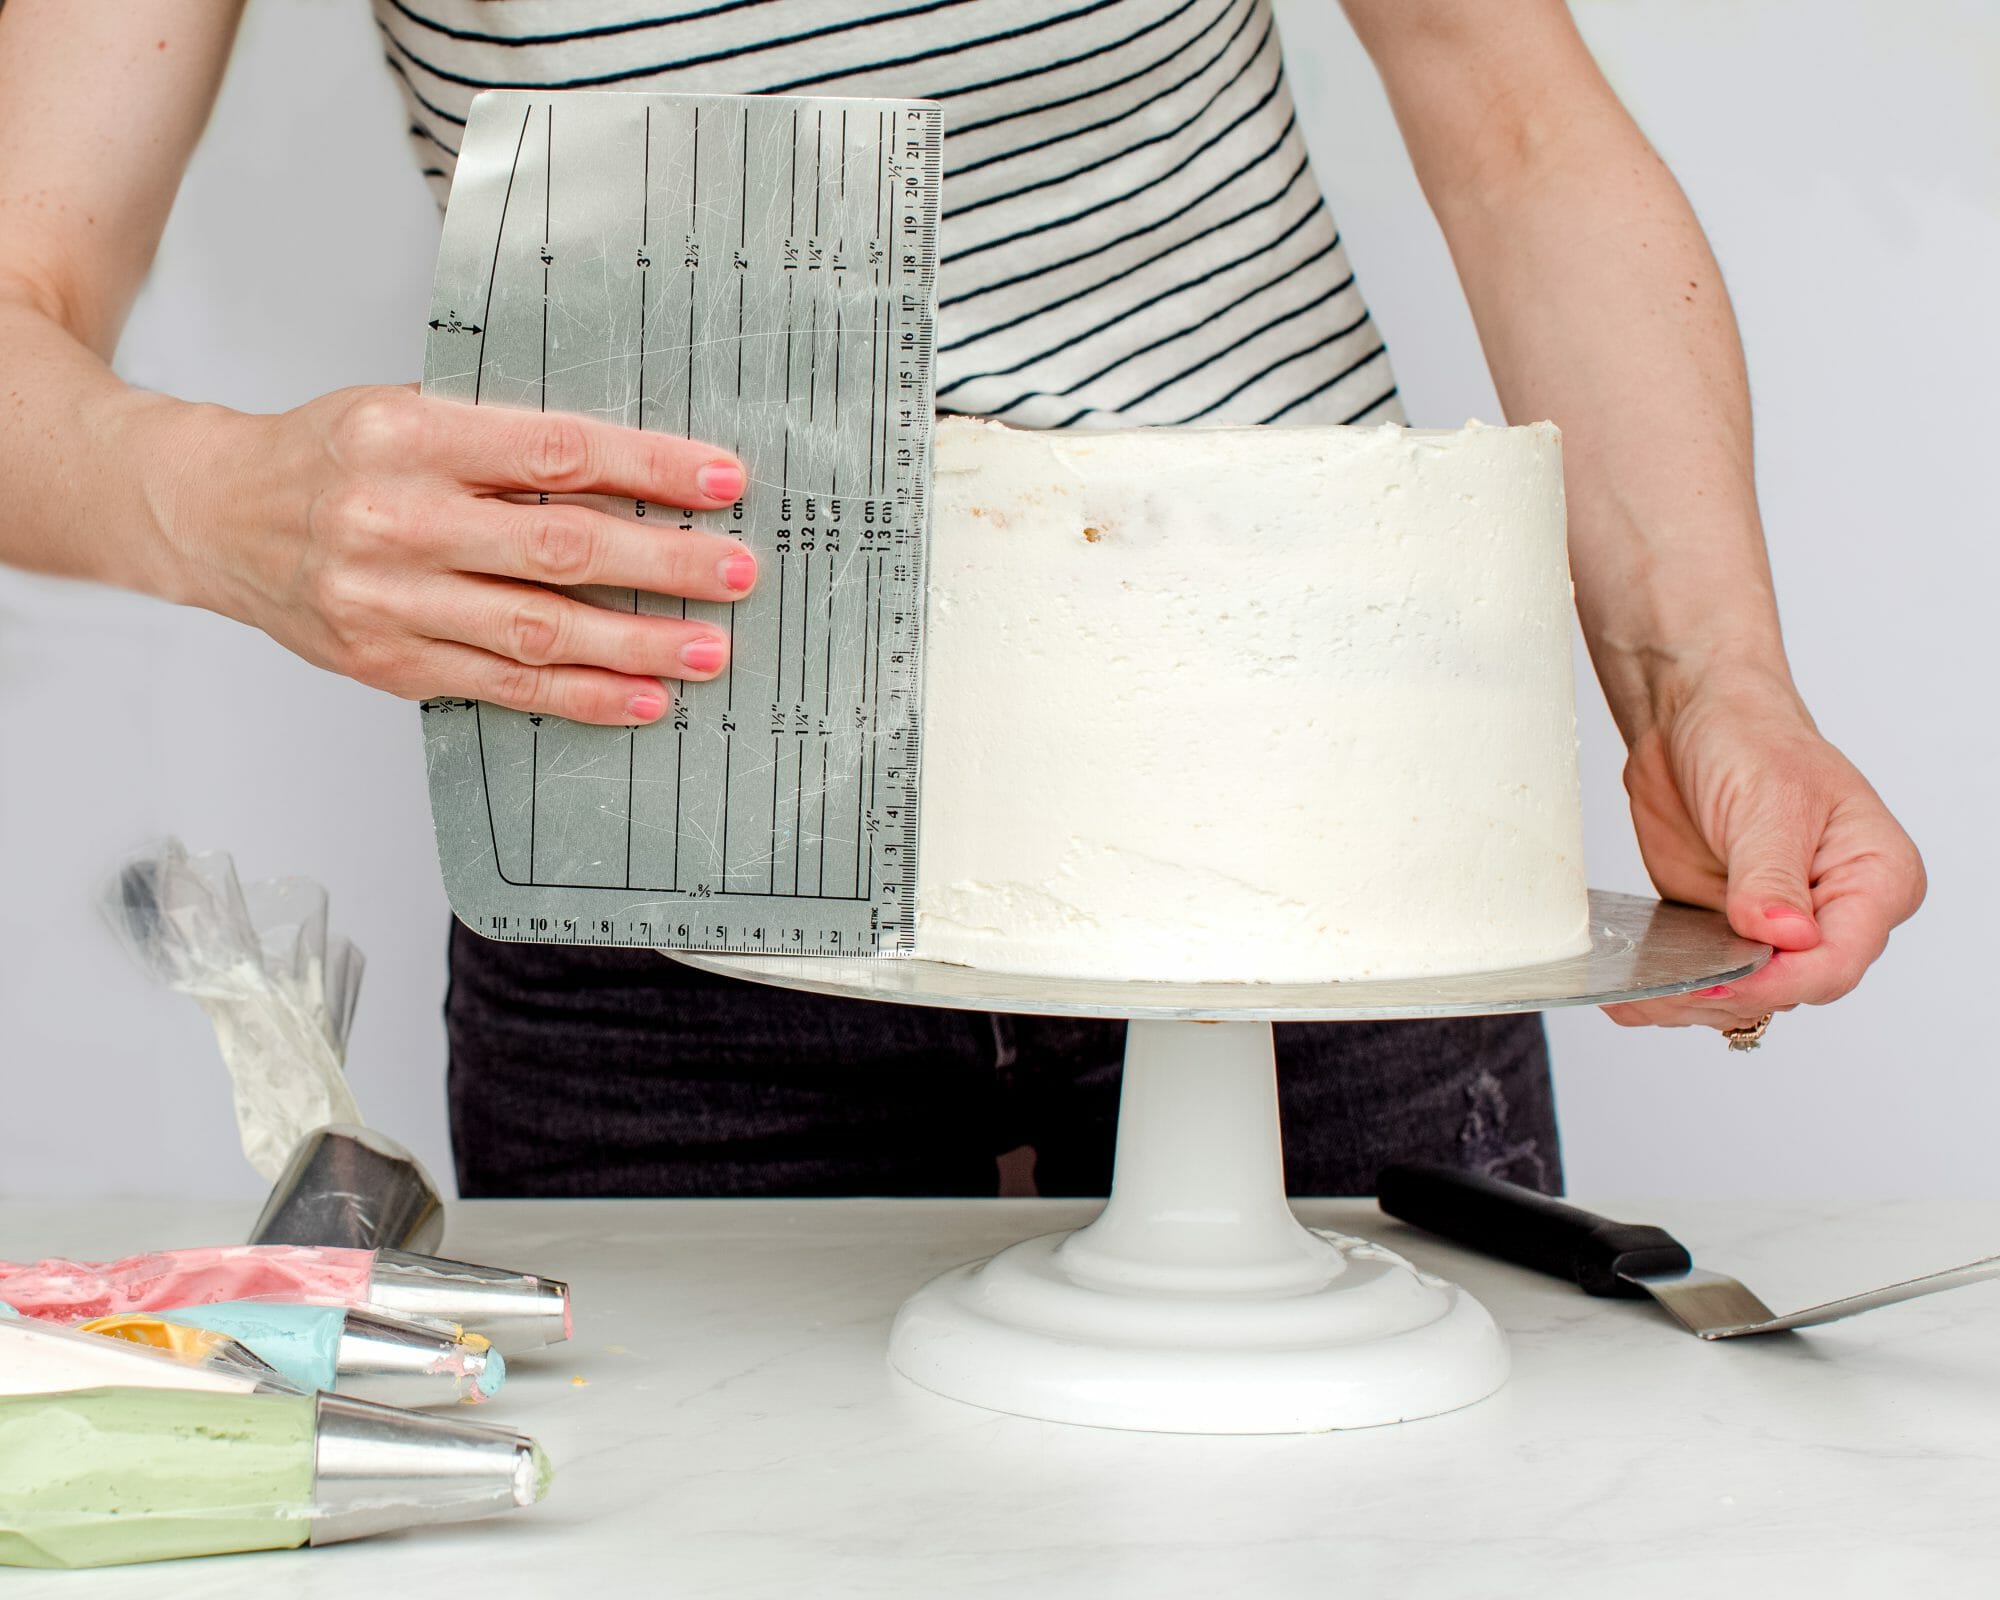
Use an angled spatula to smooth the top of the cake. Allow the cake to crust in refrigerator about 30 minutes.

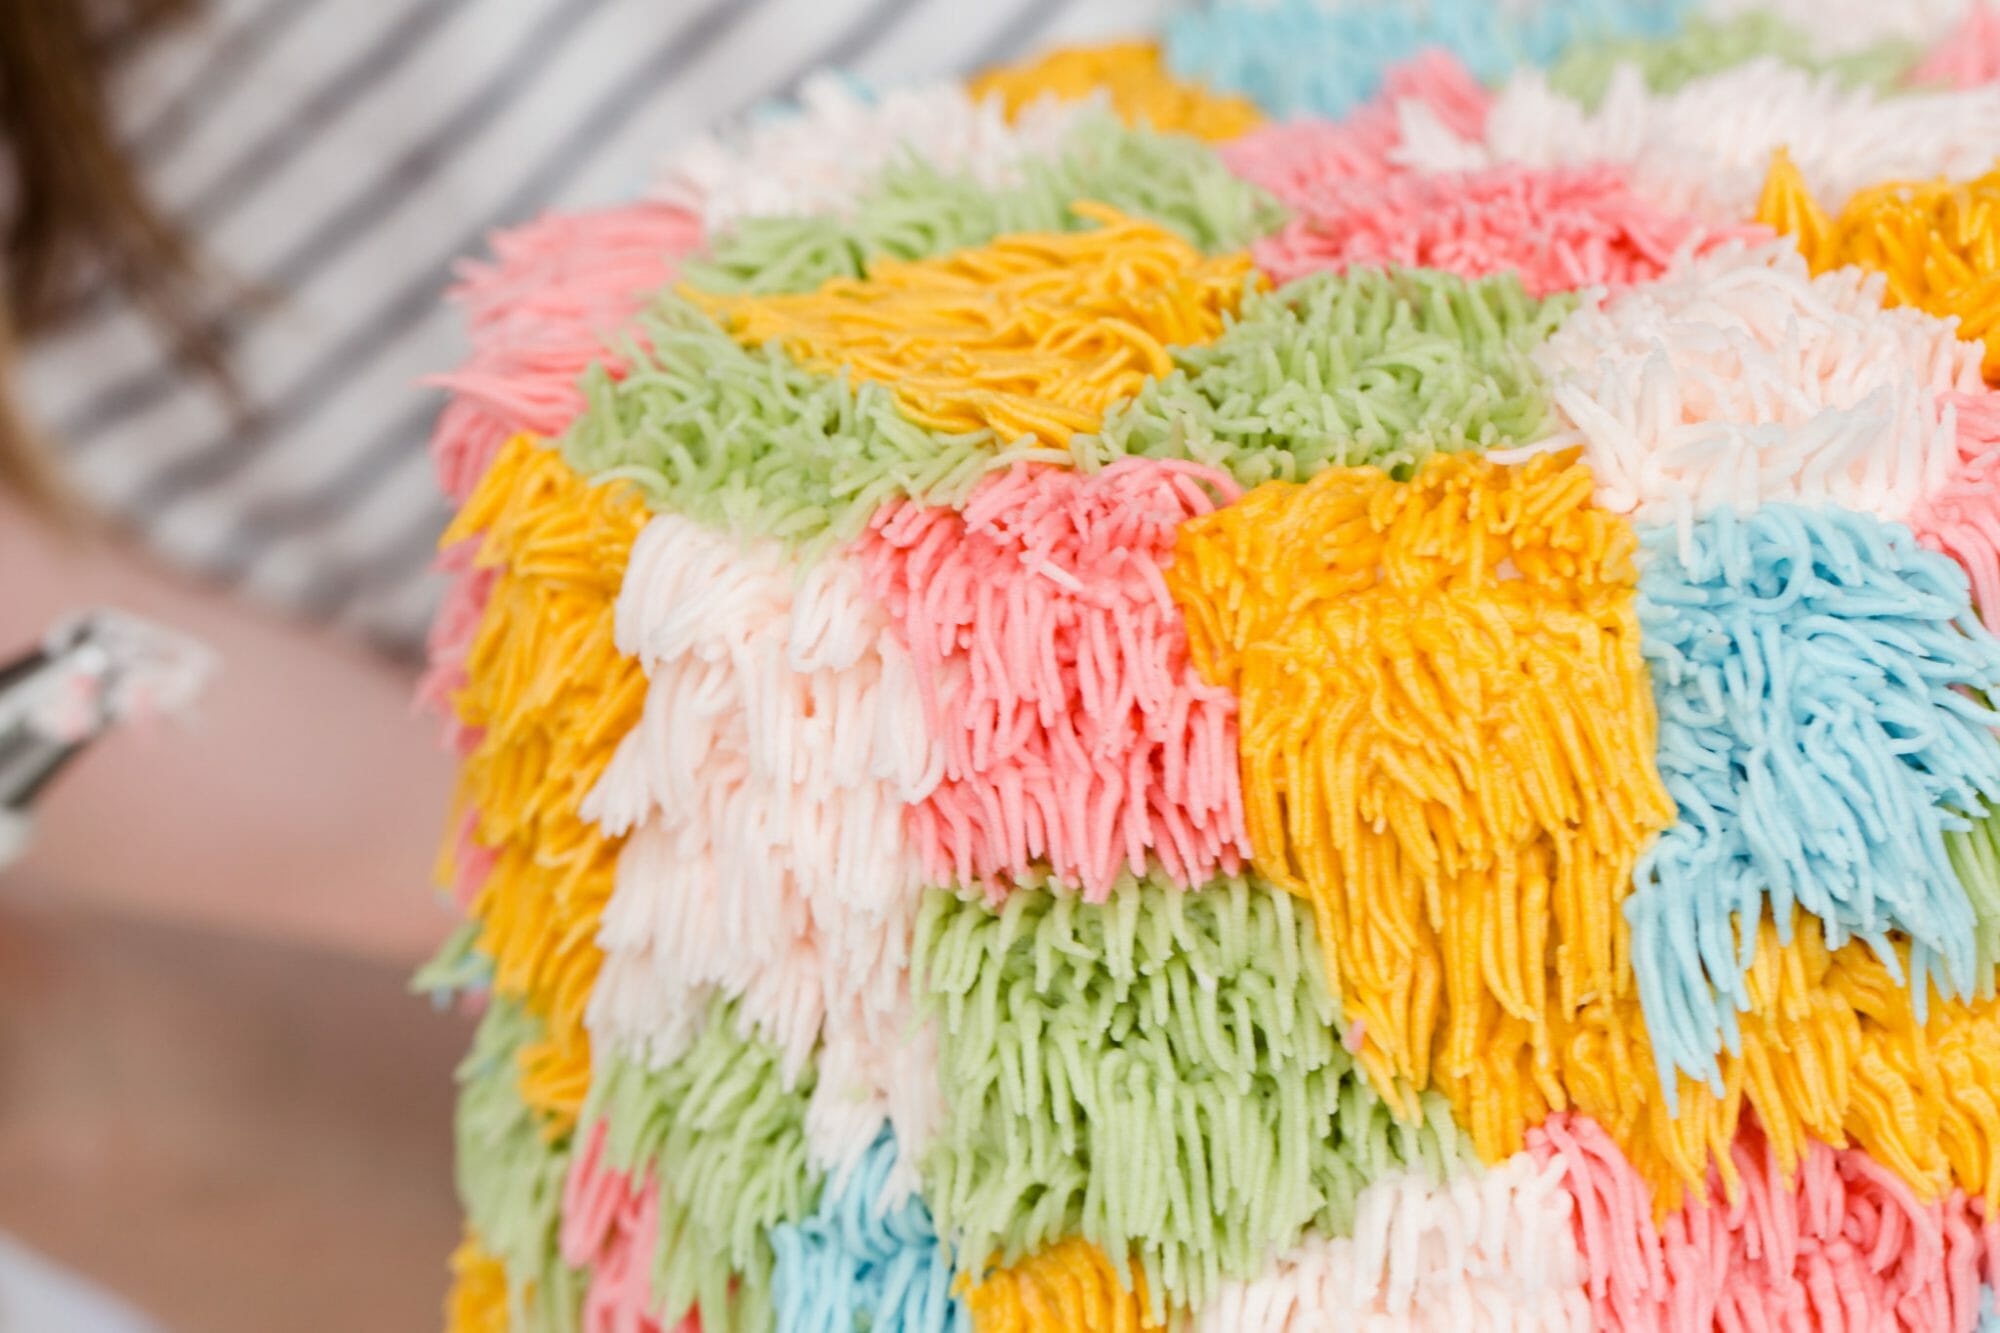
When the cake is chilled, start by piping small groupings of buttercream “fur” or “grass” (whatever it looks like to you)! 
No specific sizing or design, just clusters of different colors going around the cake until it is completely filled in.

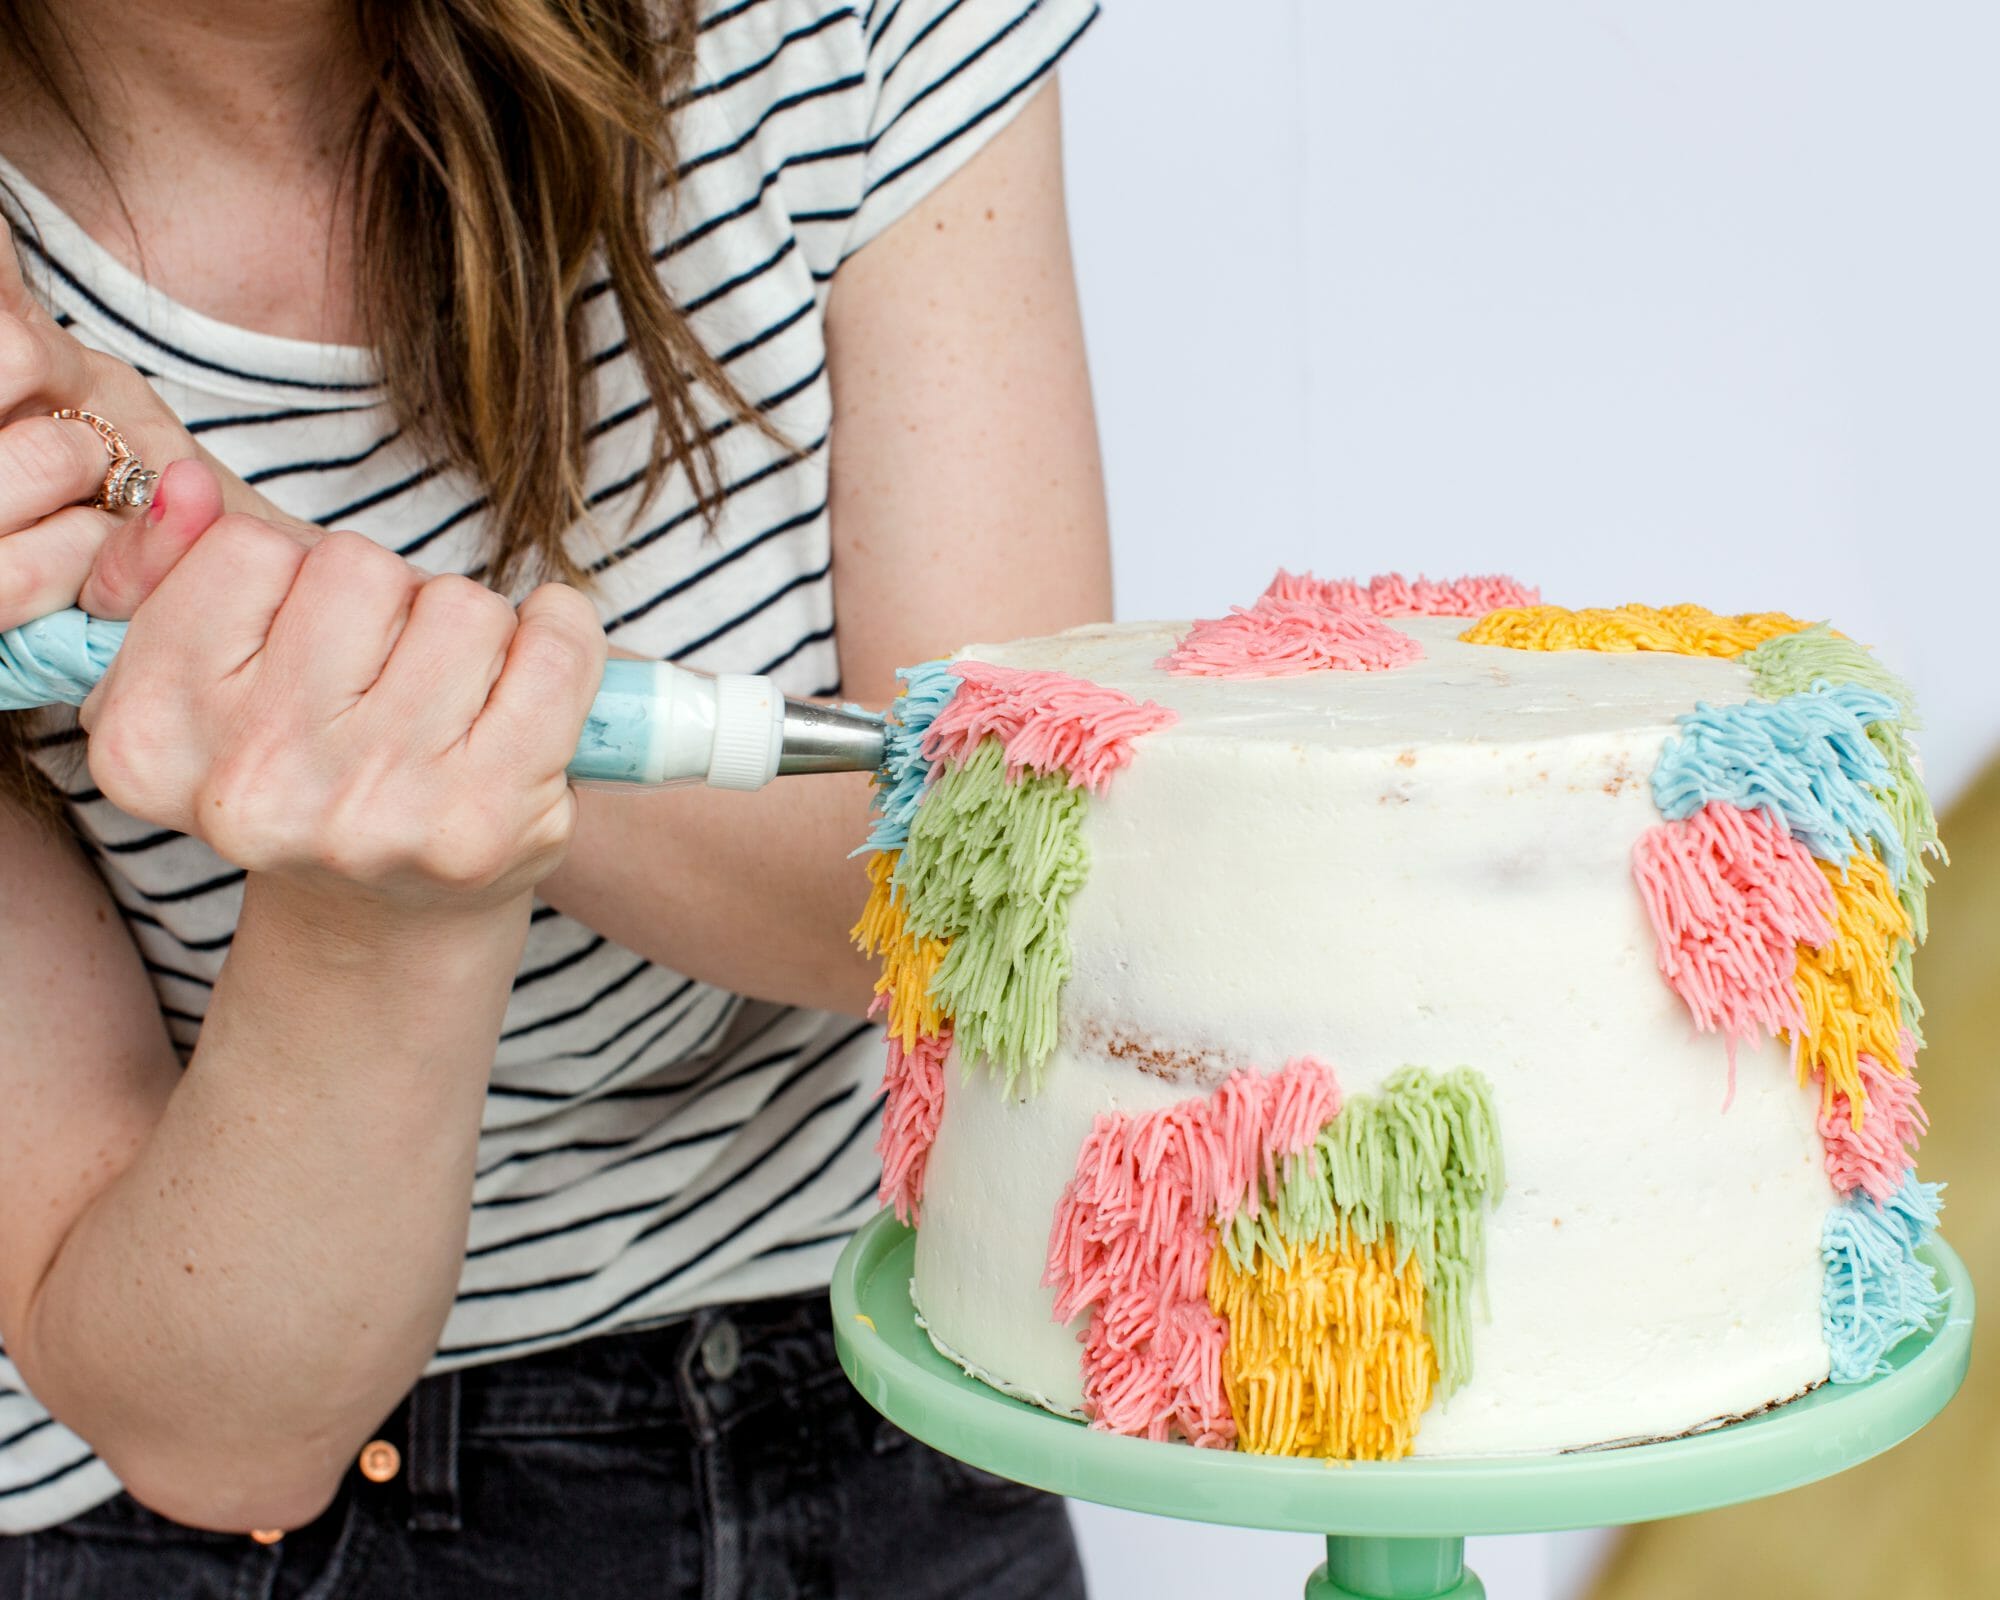
I kept mine very random with different shaped clusters of icing.
After the cake is completely covered in icing, go through it one more time to fill in any holes or gaps in icing.
Keep cake refrigerated until serving.

When ready to cut, be sure to grab a camera. The inside design is photo worthy!


Yippee!! Isn’t it great?! Can’t wait to see how your cake turns out. Tag us in your pic using the hashtag #jennycookies.
Enjoy!
Pin this idea for later!


Photos by Kelly Clare Photography
THIS IS A SPONSORED POST. JENNY COOKIES HAS RECEIVED PAYMENT, TRADE AND/OR PRODUCTS IN EXCHANGE FOR PROMOTING, HOWEVER ALL OPINIONS STATED ARE MY OWN AND I ONLY PROMOTE PRODUCTS/COMPANIES I LOVE.
Love this! Seems to simple to do. I might be able to pull it off.