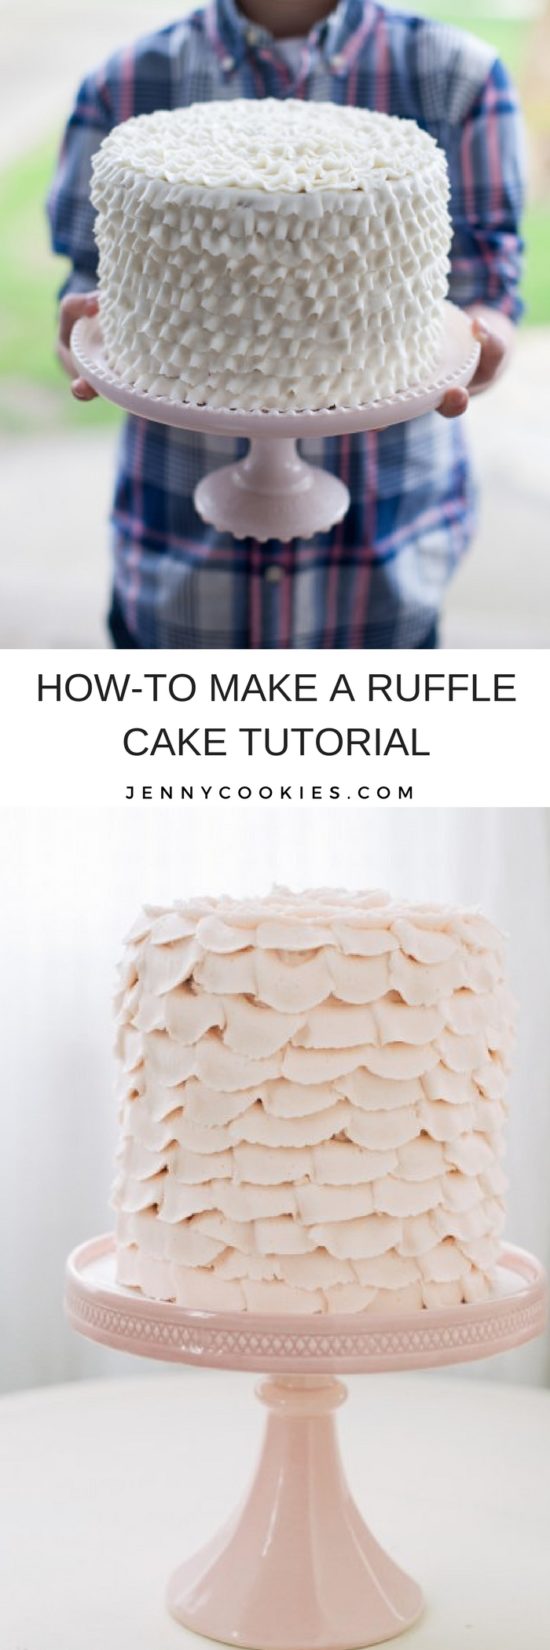
How to Make a Ruffle Cake
Ruffle cakes are one of the sweetest and easiest cakes to decorate! With a few twists of the wrist, these charming ruffles will delight any guest.
Vanilla Ruffle Cake
makes one 2-layer 8″ cake
You will need:
cooking spray
(2) 8″ nonstick baking pans
Disposable decorating bags
Wilton 104 tip
cake board
cake turn table
angled spatula
Ingredients:
1 box vanilla cake mix (I prefer Duncan Hines)
1 (3.4 oz) box Jell-O vanilla instant pudding and pie filling
1 cup water
4 eggs
1/3 cup oil
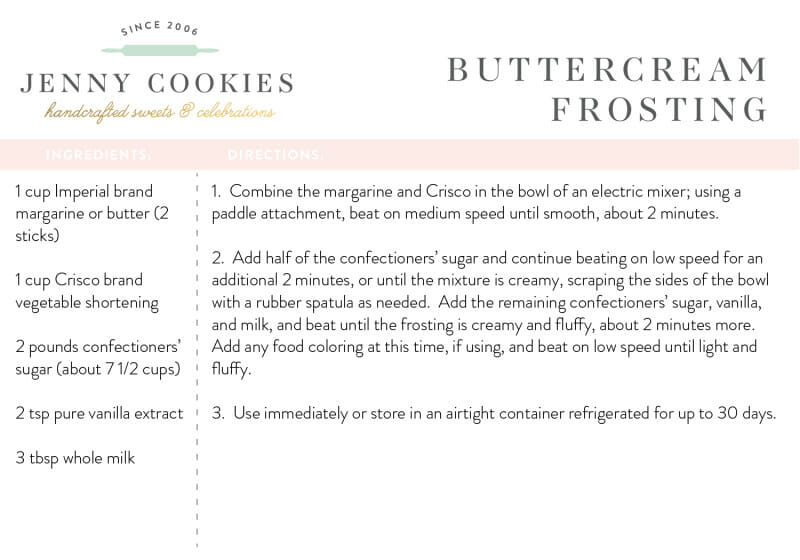
1 batch buttercream icing (recipe card below)
Directions
1. Preheat oven to 350 degrees. Coat the two 8″ round nonstick pans with cooking spray, or grease and flour the pans tapping out the excess flour. Set aside.
2. In a large bowl and using an electric stand mixer fitted with a paddle attachment, beat the cake mix, pudding mix, water, oil and eggs on medium speed for 2 to 3 minutes. Scrape the sides of the bowl and mix again until all the ingredients are incorporated.
3. Pour the batter into the prepared cake pans, filling each one approximately 3/4 full.
4. Place the pans in the preheated oven on the middle rack. Bake for 30-35 minutes or until a toothpick inserted comes out clean.
5. Meanwhile, make buttercream frosting.
6. Remove the pans from the oven and place on wire cooling racks for 35-30 minutes. Run a knife around the edges of the cakes, flip the pans over and gently extract the cakes. Return the cakes to the wire racks and finish cooling completely before frosting and decorating. After layers are cooled, freeze or refrigerate the cakes for 1 hour before decorating to reduce crumbs and make for a smoother icing process.
7. Trim the crowns from the cake layer tops with a cake cutter or long serrated knife so they are flat and even.
8. Place one of the 8″ cakes on a cake board. Using the angled spatula, spread about 1/2 cup of the buttercream icing evenly across the top of the cake layer. Place the second 8″ cake on top of the first, with the cut side on the bottom. Use the angled cake spatula to cover the cake completely with a very thin layer of icing (this is called a crumb coat) to help reduce the amount of crumbs in the final coat of icing. Set the cake aside to allow to dry, about 30-60 minutes.
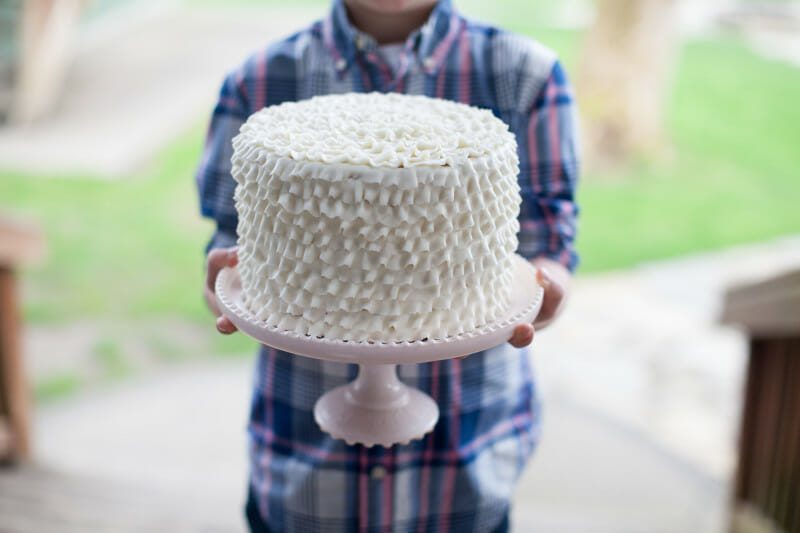
9. Place the cake on a rotating cake turntable. Fill the pastry bag with buttercream icing. Using Wilton decorating tip #104, start at the bottom of the cake with the widest side of the tip closest to the cake. Begin to squeeze the pastry bag with even pressure while slowly spinning the cake to create ruffles. Continue decorating the cake until finished with the sides of the cake.
10. Starting at the outer edge of the top of the cake, holding the decorating tip with the widest end closest to the cake top, use the same technique, spinning the turntable and squeezing the pastry bag with even pressure to create ruffles around the top of the cake until you meet in the middle.
Vanilla Ruffle Cake
Equipment
- cooking spray
- (2) 8" nonstick baking pans
- Disposable Decorating bags
- Wilton 104 tip
- cake board
- Angled Spatula
Ingredients
- 1 box vanilla cake mix I prefer Duncan Hines
- 1 3.4 oz box Jell-O vanilla instant pudding and pie filling
- 1 cup water
- 4 eggs
- 1/3 cup oil
- 1 batch buttercream icing recipe card below
Instructions
- Preheat oven to 350 degrees. Coat the two 8" round nonstick pans with cooking spray, or grease and flour the pans tapping out the excess flour. Set aside.
- In a large bowl and using an electric stand mixer fitted with a paddle attachment, beat the cake mix, pudding mix, water, oil and eggs on medium speed for 2 to 3 minutes. Scrape the sides of the bowl and mix again until all the ingredients are incorporated.
- Pour the batter into the prepared cake pans, filling each one approximately 3/4 full.
- Place the pans in the preheated oven on the middle rack. Bake for 30-35 minutes or until a toothpick inserted comes out clean.
- Meanwhile, make buttercream frosting.
- Remove the pans from the oven and place on wire cooling racks for 35-30 minutes. Run a knife around the edges of the cakes, flip the pans over and gently extract the cakes. Return the cakes to the wire racks and finish cooling completely before frosting and decorating. After layers are cooled, freeze or refrigerate the cakes for 1 hour before decorating to reduce crumbs and make for a smoother icing process.
- Trim the crowns from the cake layer tops with a cake cutter or long serrated knife so they are flat and even.
- Place one of the 8" cakes on a cake board. Using the angled spatula, spread about 1/2 cup of the buttercream icing evenly across the top of the cake layer. Place the second 8" cake on top of the first, with the cut side on the bottom. Use the angled cake spatula to cover the cake completely with a very thin layer of icing (this is called a crumb coat) to help reduce the amount of crumbs in the final coat of icing. Set the cake aside to allow to dry, about 30-60 minutes.
- Place the cake on a rotating cake turntable. Fill the pastry bag with buttercream icing. Using Wilton decorating tip #104, start at the bottom of the cake with the widest side of the tip closest to the cake. Begin to squeeze the pastry bag with even pressure while slowly spinning the cake to create ruffles. Continue decorating the cake until finished with the sides of the cake.
- Starting at the outer edge of the top of the cake, holding the decorating tip with the widest end closest to the cake top, use the same technique, spinning the turntable and squeezing the pastry bag with even pressure to create ruffles around the top of the cake until you meet in the middle.
Notes
Watch my quick video for step-by-step instructions!
*Note the cake in the video is a three layer cake. Recipe above makes a two layer cake. If you’d like to make the same size cake as pictured in the video, you’ll want to double the recipe and bake three cakes instead of two. You can use the remaining batter for cupcakes, make a 4 layer cake, or use extra cake for cake pops!
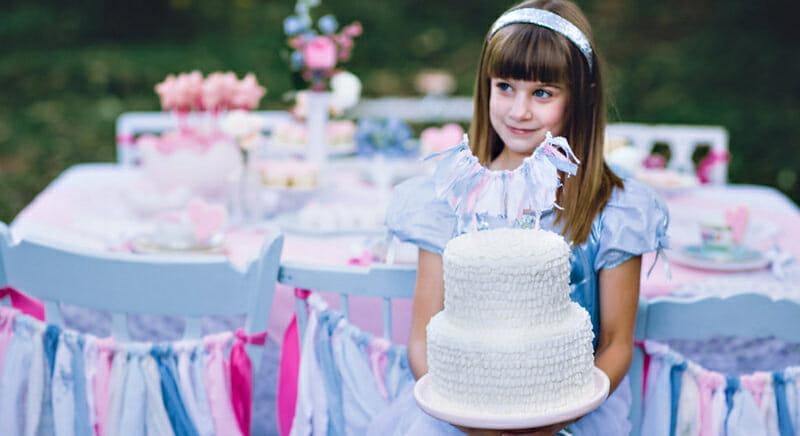
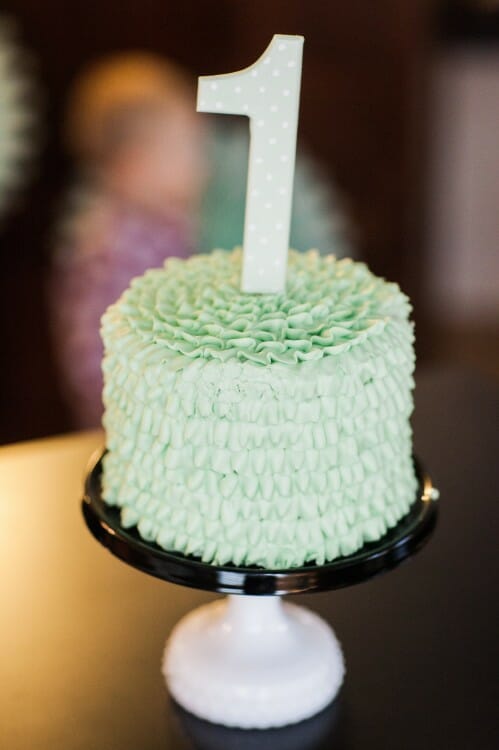
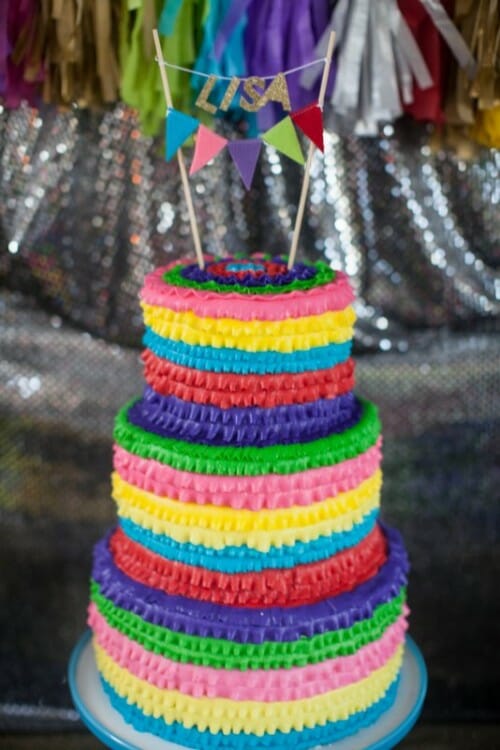
Below you’ll find a few more examples of this decorating technique on cakes:
For more simple and delicious recipes, check out my book Eat More Dessert!
Pin this idea for later!
I like your website, but it is little misleading . The video you have for the ruffle cake shows a big high beautiful cake . In the directions, it calls for one box of cake mix. That box is not going to produce a cake of that size!
Hi Lisa! Good eye! Yes, the cake shown in the video has three layers. If you’d like to make the taller cake as seen in video, you’ll want to double the recipe and use a second box of cake mix. I edited the post to add this info as I definitely don’t want to mislead anyone. The basis of the post was focused more on the actual decorating technique rather than cake recipe, as there are many ruffle cake photos included. Thanks for the feedback!
Hi Jenny, Loved the video! My friend wants a ruffled cake, but with the ruffle upside down. Same method? Any tips? Thank you!
It’s a lot harder than it looks my ruffle kept falling off my cake. I think my buttercream was too thin? Or what is the problem when that happens? Love your cakes and videos though!!!
I would like your buttercream recipe please