To start, you’ll need to melt your chocolate chips or candy melts in a microwave safe bowl in 30 second increments. If your chocolate is too thick, I always recommend Wilton’s EZ Thin chips to thin out the chocolate. You can also use a little Crisco or vegetable oil in small increments.
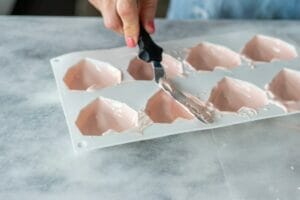
When chocolate is completely melted, use a small cookie scoop to add chocolate to the silicone mold. Use a spoon to spread chocolate around each cavity, making sure to pull chocolate up to the tops of each.
Line counter with a piece of parchment or wax paper. Gently flip mold upside down to let excess chocolate drip out. You can add the loose chocolate on the parchment back into the bowl of melted chocolate, or wait for it to dry and store it in a zip-lock container for future chocolate making!
Flip mold back over and with an angled spatula, scrape excess chocolate off. Place silicone molds into the refrigerator for 20-25 minutes.
After chocolate has firmed up, repeat steps 2-4 to create a thicker shell.
When 2nd round of melted chocolate has completely dried in refrigerator, carefully pop hearts out of the silicone molds.
Warm a frying pan on your stove. Remove from heat and place near your work area. Using half of the total chocolate hearts, gently place chocolate onto the frying pan to carefully melt any rough edges or uneven areas. (Reserve second half for the tops of the bombs). Just a couple of seconds is all it takes! Return to parchment, with open cavity facing up (I like to lay parchment in a sheet pan so I can move it easily).
Fill each cavity with cocoa mix and top with mini marshmallows.
Repeat step 7, gently melting the tops of the chocolate hearts. While still tacky, top each cocoa filled heart with a chocolate top. Use towel or clean hand to clean up any edges.
If you’d like, dust each geometric heart with luster dust to give it a little sparkle! Not necessary but helps define the edges and shape of the heart. You can also sprinkle a little disco dust (I call it pixie dust!) to the tops of the hearts.
